
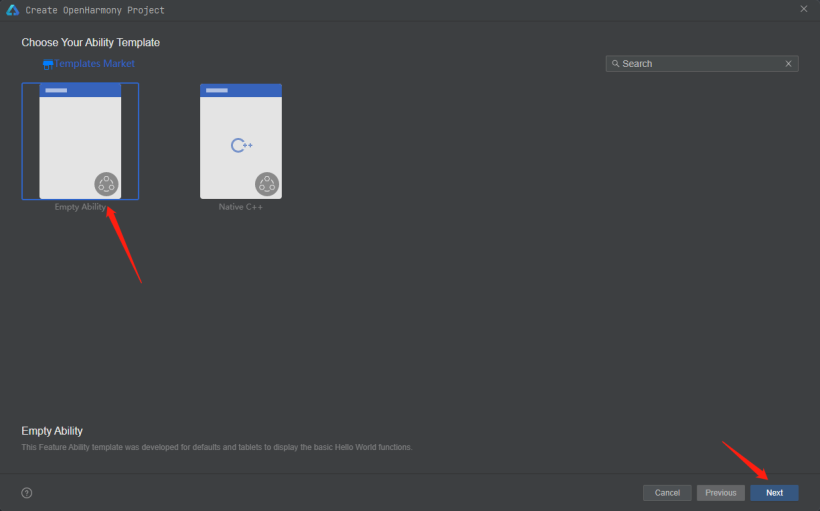
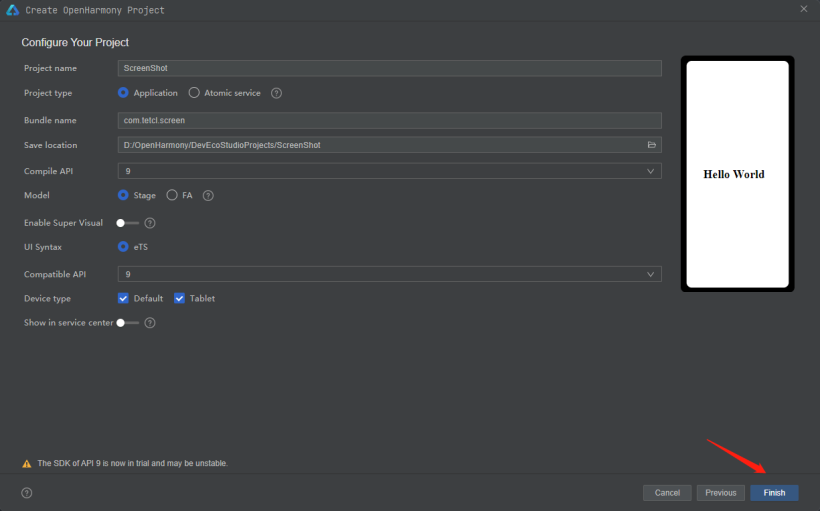
为探究OpenHarmony 屏幕截图API做的工作
文章目录
-
- a. 执行命令查看是否为bash,如果不是则按照[b]操作,若是则跳过。 b. 执行命令,将Shell由dash改为bash。 c. 更改成功。
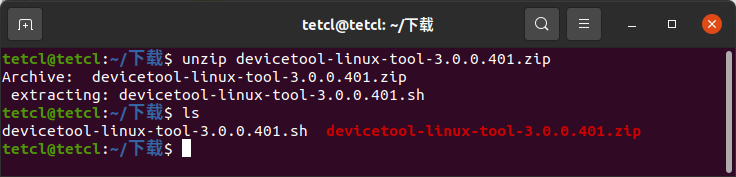
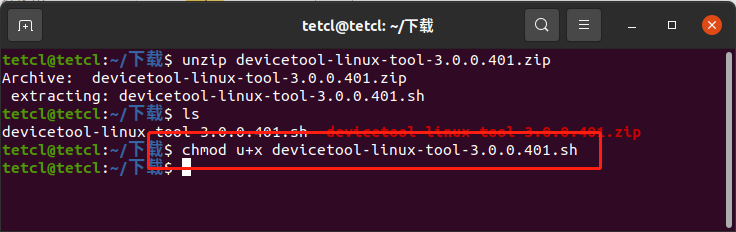
- unzip devicetool-linux-tool-3.0.0.401.zipchmod u+x devicetool-linux-tool-3.0.0.401.sh
- sudo ./devicetool-linux-tool-3.0.0.401.sh 等待安装完成。 出现图中红框内容,则表示安装成功。
- a. 执行命令sudo apt-get install openssh-server安装SSH服务。 b. 执行命令sudo systemctl start ssh启动SSH服务,执行命令sudo systemctl status ssh查看状态,为active(running)则启动成功。
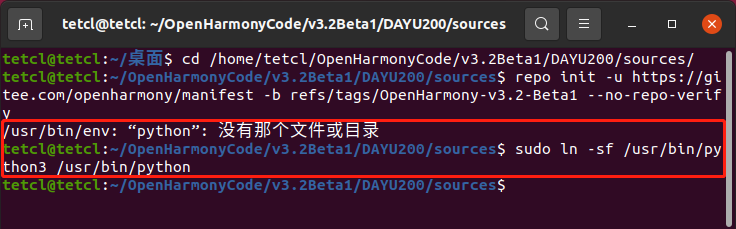
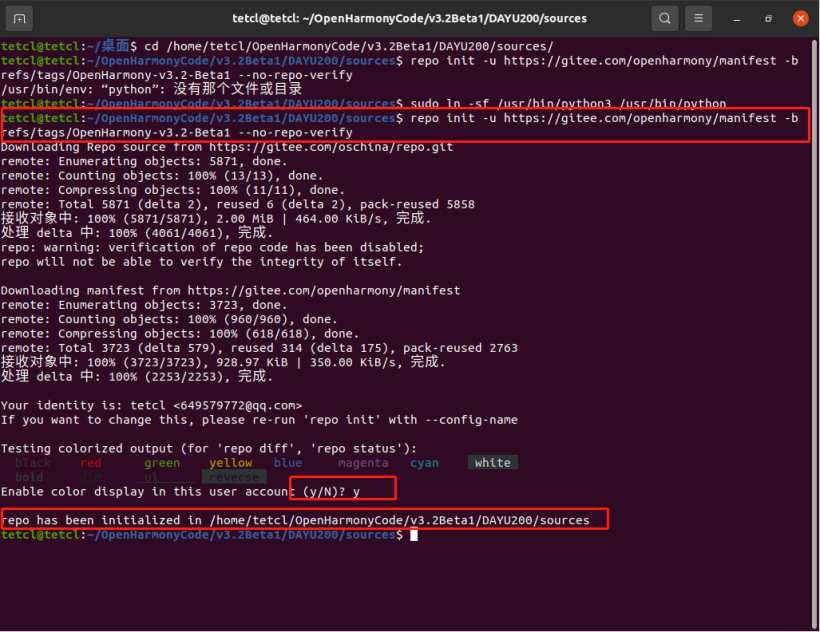
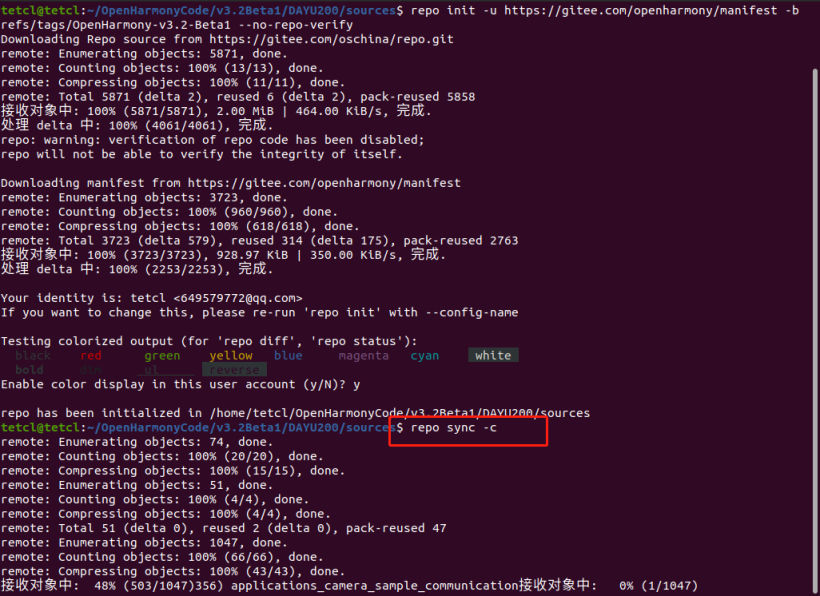
- a. 执行命令sudo apt-get install git git-lfs安装git客户端和git-lfs。 b. 配置用户信息。 git config --global user.name "yourname"git config --global user.email "your-email-address"git config --global credential.helper store c. 安装码云repo工具。 curl https://gitee.com/oschina/repo/raw/fork_flow/repo-py3 -o /usr/local/bin/repo #如果没有权限,可下载至其他目录,并将其配置到环境变量中chmod a+x /usr/local/bin/repopip3 install -i https://repo.huaweicloud.com/repository/pypi/simple requests 如果提示 Command 'curl' not found, but can be installed with: sudo apt install curl 则执行命令 sudo apt-get install curl 安装 curl。 若提示权限不够,则在命令前加sudo。 d. 使用repo+https下载发布Tag节点源码。 创建源码存放目录。 进入创建的源码存放目录,执行以下命令下载源码。 repo init -u https://gitee.com/openharmony/manifest -b refs/tags/OpenHarmony-v3.2-Beta1 --no-repo-verifyrepo sync -crepo forall -c 'git lfs pull' 提示/usr/bin/env: "python": 没有那个文件或目录,则执行命令sudo ln -sf /usr/bin/python3 /usr/bin/python创建一个链接。 e. 在源码目录下执行bash build/prebuilts_download.sh安装编译器及二进制工具。
-
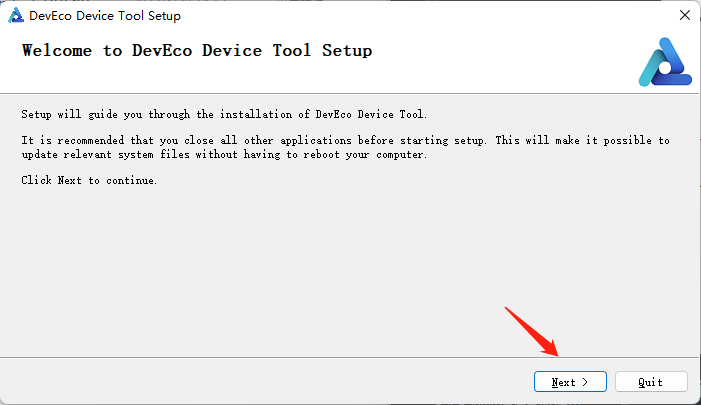
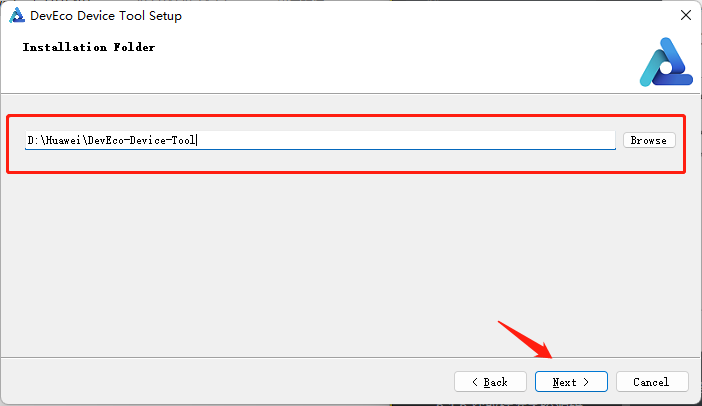
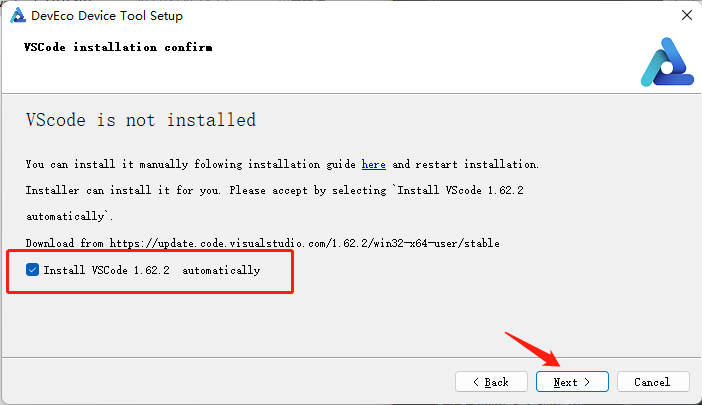
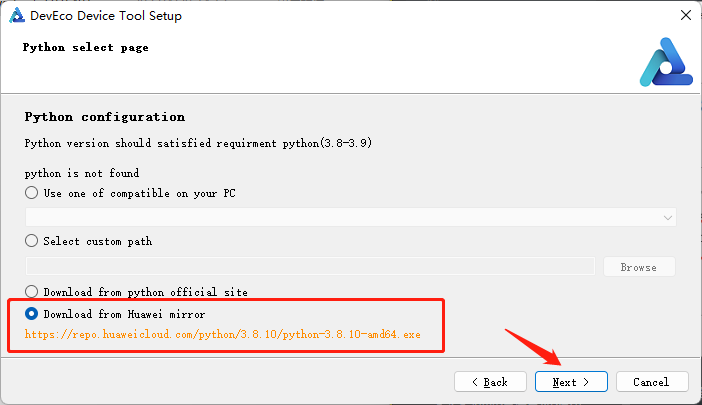
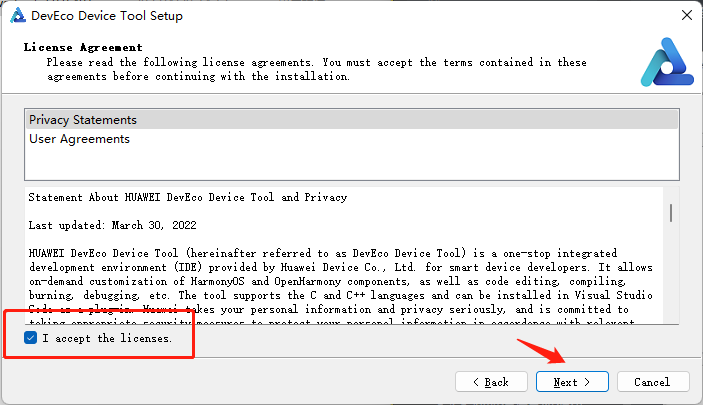
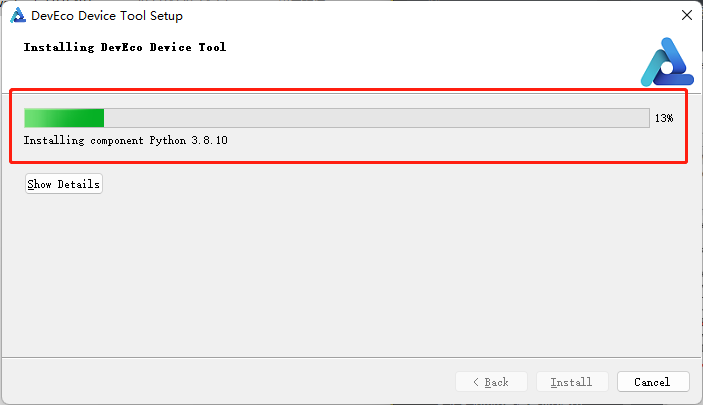
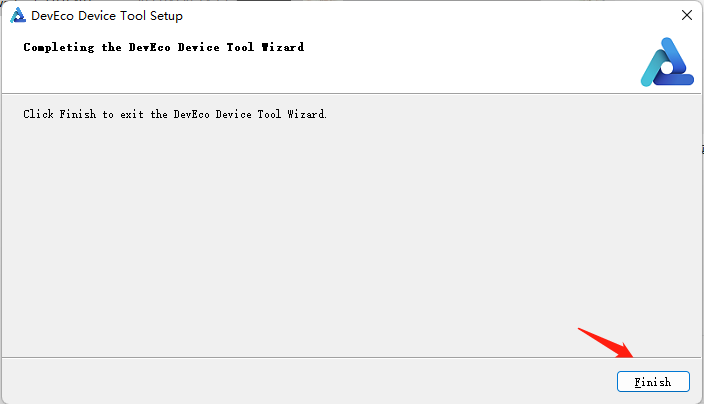
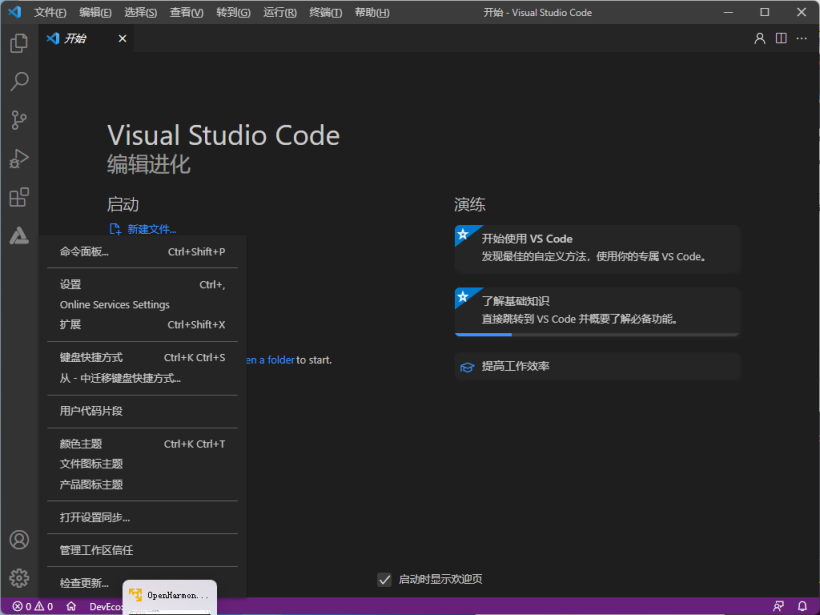
- a. 点击devicetools-windows-tool-xxx.exe打开安装向导。 b. 选择安装位置。 c. 同时安装VSCode。 d. 选择python路径(如果安装过),没有安装,则选择下载安装。 e. 选择其他组件,默认即可。 f. 接受协议。 g. 等待安装完成,安装过程会弹出python安装界面,切勿操作。 h. 完成安装。 i. 打开VSCode,等待检查更新完成后重启。
- a. 在左侧扩展中搜索Remote-SSH,并安装。 b. 配置Ubuntu远程连接。 在Ubuntu虚拟机中执行ifconfig获取虚拟机IP地址,若提示Command 'ifconfig' not found, but can be installed with: sudo apt install net-tools则执行sudo apt-get install net-tools命令,然后再次执行ifconfig获取虚拟机IP地址。 c. 输入远程连接信息ssh tetcl@192.168.220.128 -A。 d. 选择配置文件。 e. 在远程资源管理器中出现刚才配置的IP地址时,则配置成功。
- a. 选择Linux。 b. 选择Continue。 c. 输入设置的password(两个字竟然是敏感信息)。 若提示DevEco Device Tool需要重载,则点击重载即可。
- a. 打开Git bash命令(如果没有安装,则安装Git),执行命令,生成SSH公钥。 ssh-keygen -t rsassh-copy-id -i ~/.ssh/id_rsa.pub tetcl@192.168.220.128 b. 配置公钥。 c. 断开连接,重新连接远程Ubuntu,需要输入配置SSH Key时输入的password。 OpenHarmony标准系统环境准备完毕。
- a. 打开VSCode, 首先连接远程虚拟机,然后点击左侧DevEco,主界面 --> 主页 --> 导入工程。 b. 导入工程界面快速访问选择虚拟机(tetcl),选择源码所在目录。 c. 首次导入时,会出现如下提示框,点击导入。 d. 在选择工程导入类型界面中选择从OpenHarmony源码导入。 e. 导入工程界面中,产品选择hihope下的rk3568,OpenHarmony版本选择3.x,其他默认。 f. 打开源码,将在资源管理器下看到源码目录结构。
- a. 打开主界面工程,点击配置工程。 c. 在toolchain页签中,会自动检测依赖的编译工具链是否完备,如果提示部分工具链缺失,点击安装即可自动安装。 c. 在blank配置页中,设置源码的编译类型build_type,默认即可,然后单击右上角保存按钮。 d. 在PROJECT TASKS中,点击对应的开发板下的Build进行编译。 e. 编译成功后,会在out目录下输出对应开发板所需的镜像文件。
- a. 打开瑞芯微烧录工具。 b. 将编译好的镜像文件拷贝到windows磁盘中。 c. 在瑞芯微烧录工具加载镜像窗口右键导入配置(并更改文件所在路径,确保能够找到)。 d. 连接开发板,长按更新键,然后按RESET按键,再点击瑞芯微烧录工具中的执行,在右侧会显示下载Boot,然后松开更新键,等待烧录完成。
-
- // ScreenShot/entry/src/main/ets/MainAbility/pages/index.etsimport screenshot from '@ohos.screenshot';// screenshot.save()返回的是PixelMap,因此需要导入import image from '@ohos.multimedia.image';
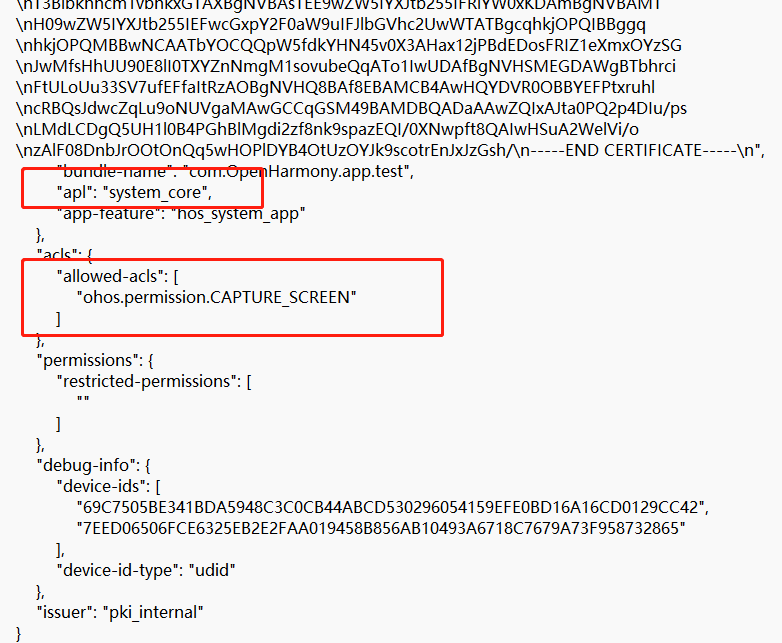
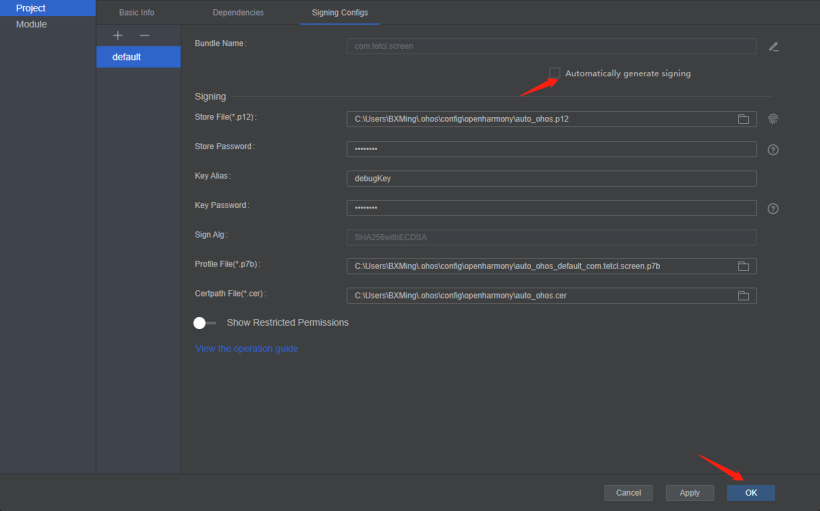
- a. module.json5中配置权限。 // ScreenShot/entry/src/main/module.json5{ "requestPermissions": [ { "name": "ohos.permission.CAPTURE_SCREEN" } ],} b. 因为screenshot是system_core等级,不仅仅需要在config.json中配置,还要修改profile文件中配置(Sdk/toolchains/版本/lib/UnsgnedReleasedProfileTemplate.json&UnsgnedDebugProfileTemplate.json)。 c. 配置完成后,对应用进行签名。
- // MainAbility.ts onWindowStageCreate() onWindowStageCreate(windowStage) { // Main window is created, set main page for this ability console.log("[Demo] MainAbility onWindowStageCreate") var context = this.context; let array: Array<string> = ['ohos.permission.CAPTURE_SCREEN']; context.requestPermissionsFromUser(array).then((data) => { console.log('ScreenShot ---> MainAbility ---> data type: ' + typeof(data)); console.log('ScreenShot ---> MainAbility ---> data: ' + JSON.stringify(data)); console.log('ScreenShot ---> MainAbility ---> data permissions: ' + data.permissions); console.log('ScreenShot ---> MainAbility ---> data result: ' + data.authResults); }).catch(err => { console.error('ScreenShot ---> MainAbility ---> err: ' + JSON.stringify(err)); }) windowStage.setUIContent(this.context, "pages/index", null) }
- // 获取屏幕截图screenshot.save(options?: ScreenShotOptions, callback: AsyncCallback<image.PixelMap>):voidscreenshot.save(options?: ScreenShotOptions): Promise<image.PixelMap>// 设置截图图像的信息ScreenShotOptions = { screenRect: { "left": 200, "top": 100, "width": 200, "height": 200 }, // 表示截图图像的区域,不传值默认为全屏 imageSize: { "width": 300, "height": 300 }, // 表示截取图像的大小,不传值默认为全屏 rotation: 0, // 表示截图图像的旋转角度,当前仅支持输入值为0,默认值为0 displayId: 0// 表示截图图像的显示设备Display的ID号,API8以上} getScreen = (isFullScreen: boolean) => { let options: screenshot.ScreenshotOptions = { screenRect: { left: 0, top: 0, width: 400, height: 400 }, imageSize: { width: 400, height: 400 }, rotation: 0, displayId: 0 } if (isFullScreen) { options = { rotation: 0 } } screenshot.save(options, (err, data: image.PixelMap) => { if (err) { console.error('ScreenShot --> error: ' + JSON.stringify(err)); return; } console.info('ScreenShot --> data: ' + JSON.stringify(data)); this.image = data; }) }

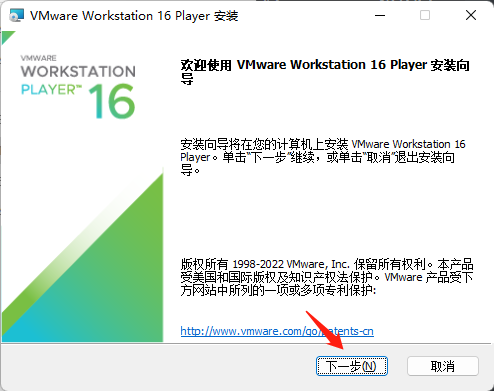
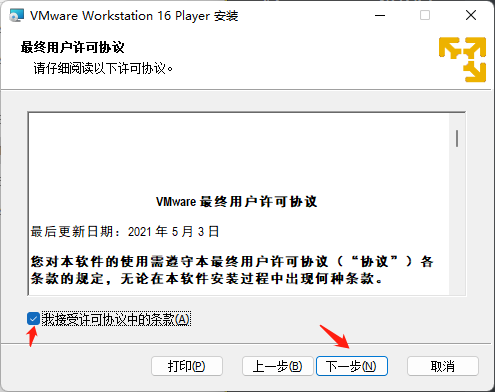
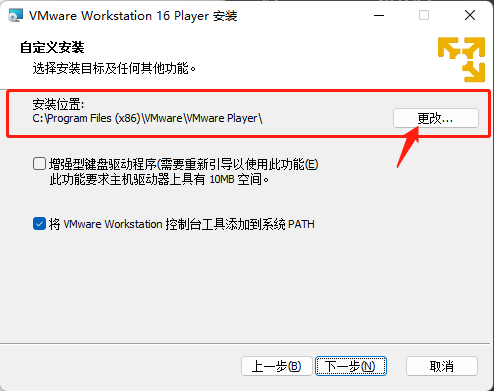
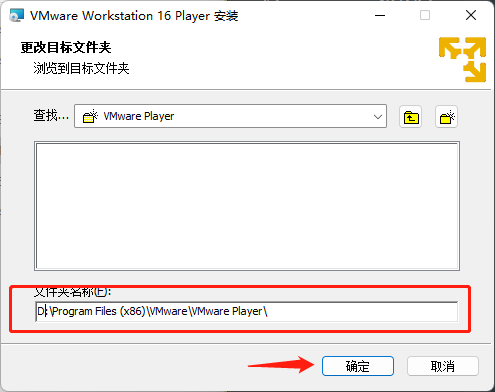
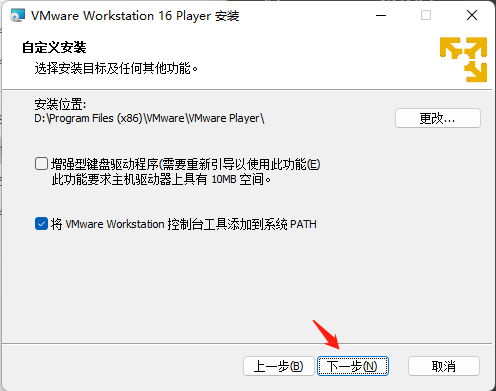
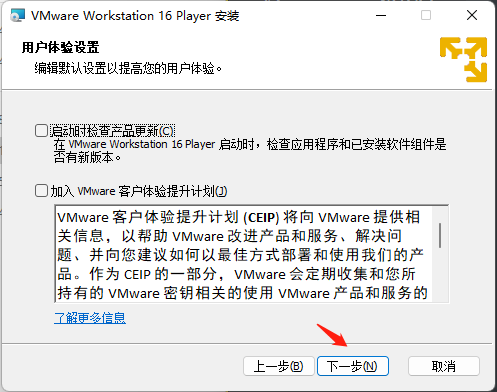
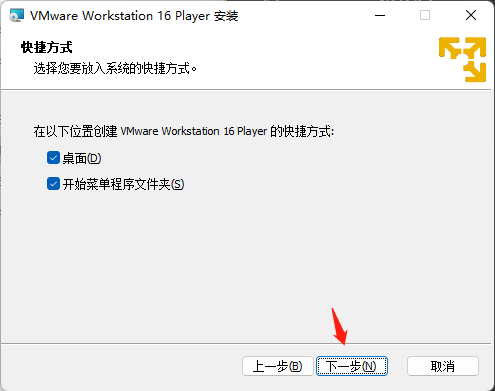
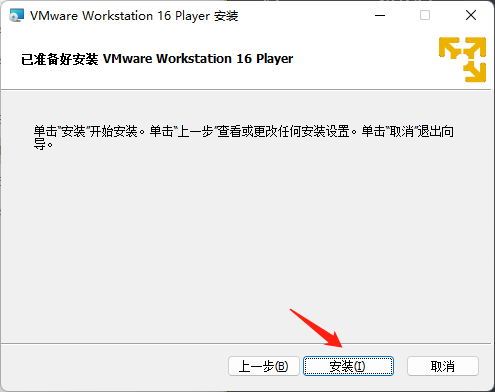
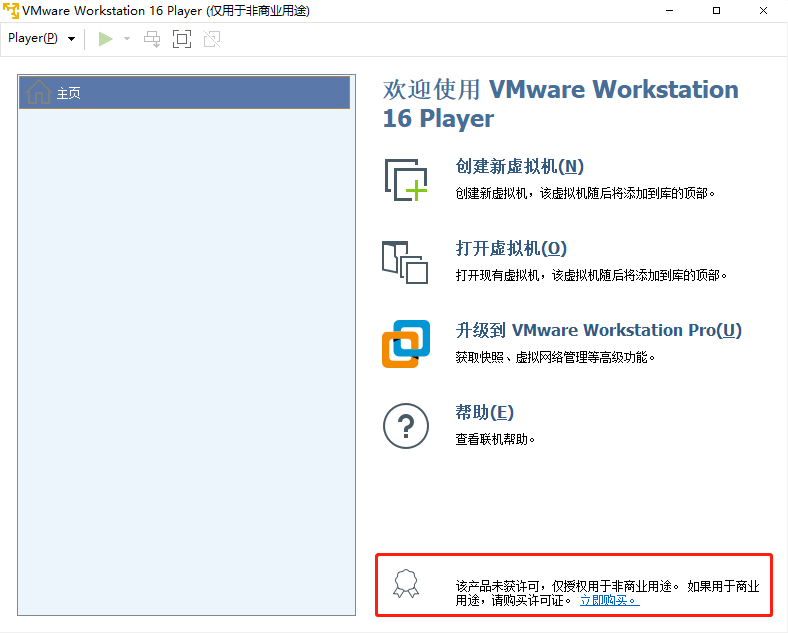
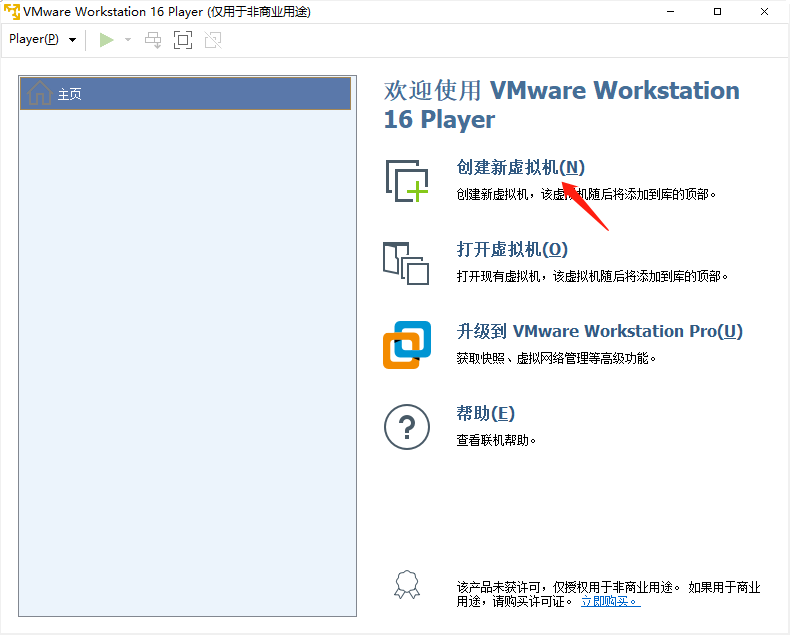
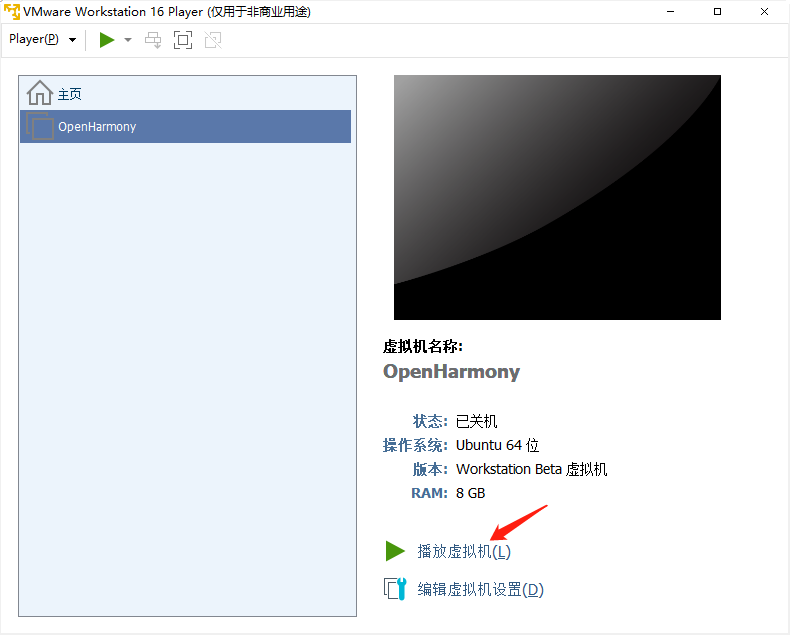
至此VM Player安装完成。
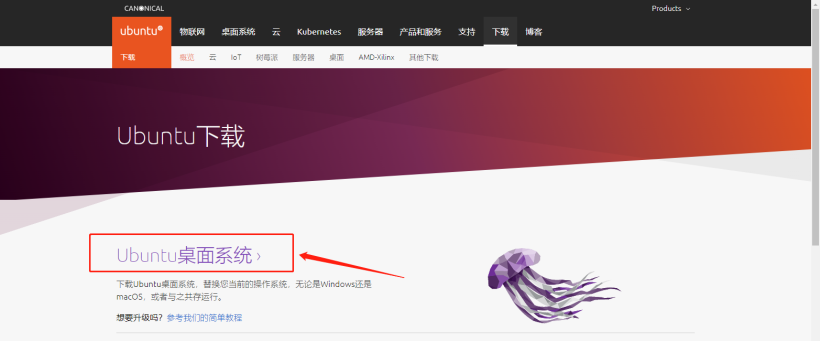
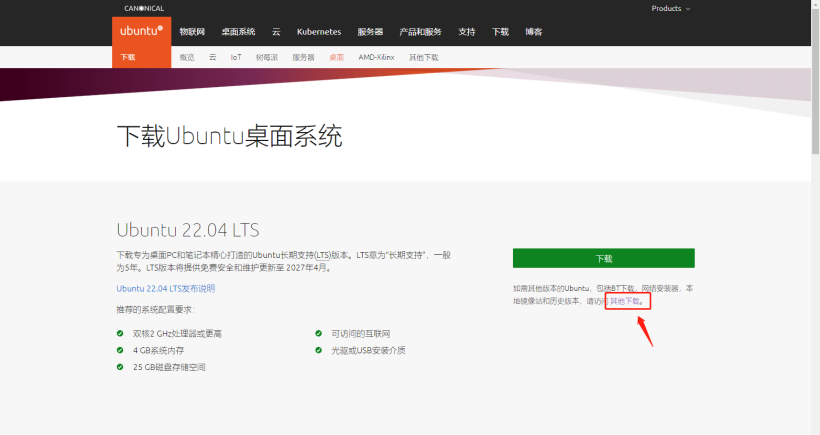
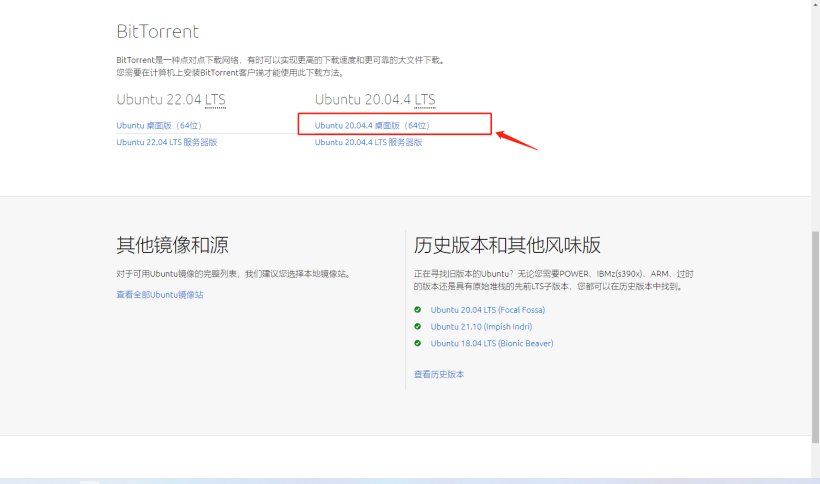
Ubuntu镜像包准备完毕。
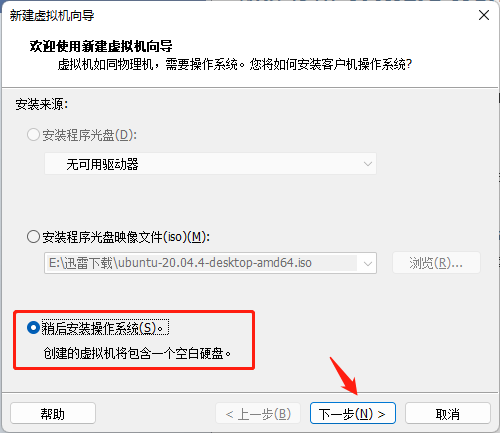
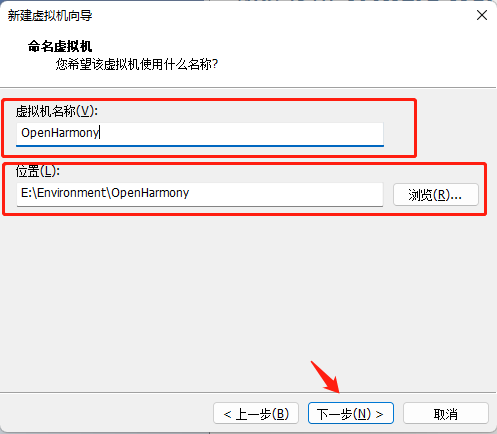
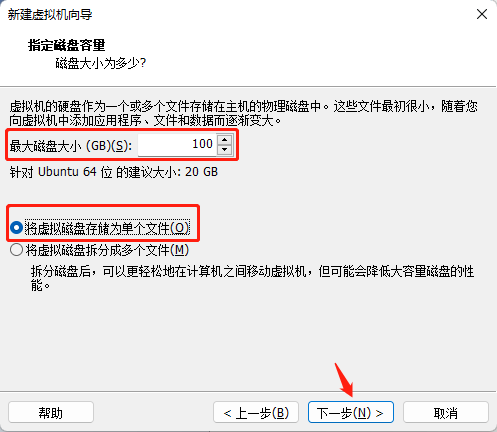
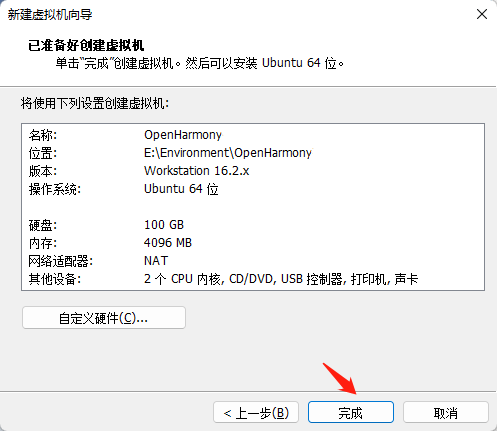
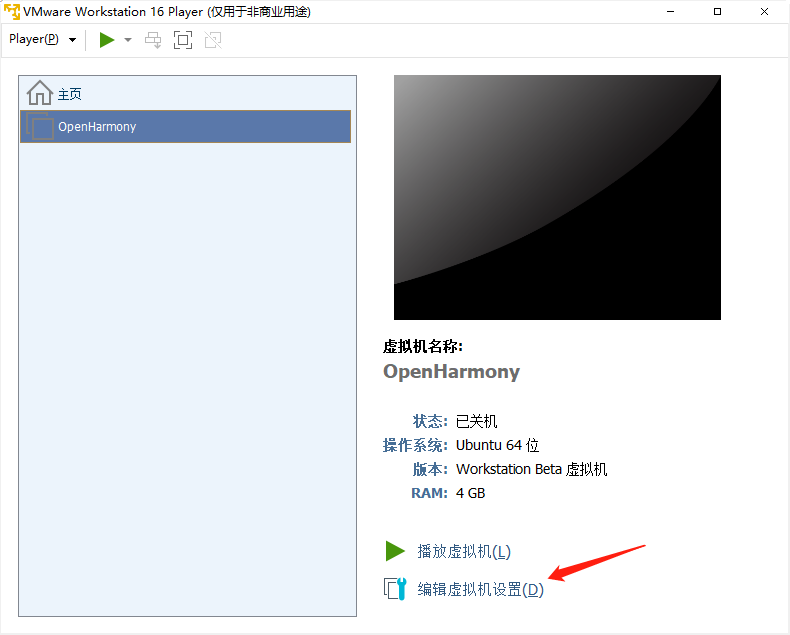

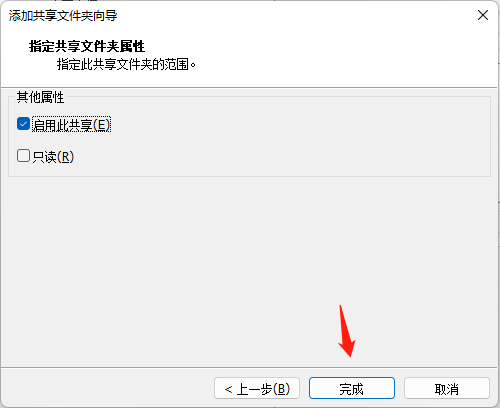
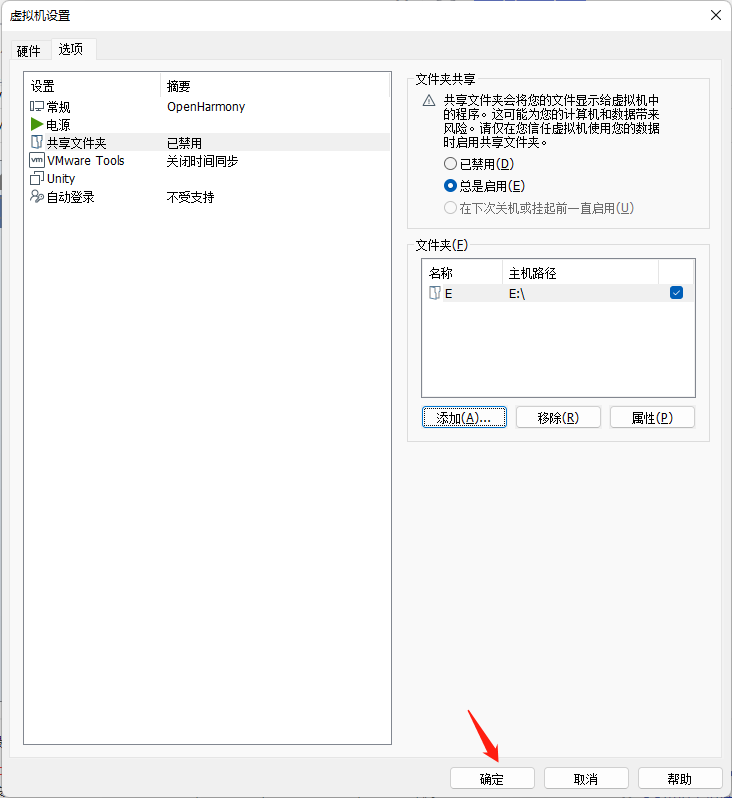
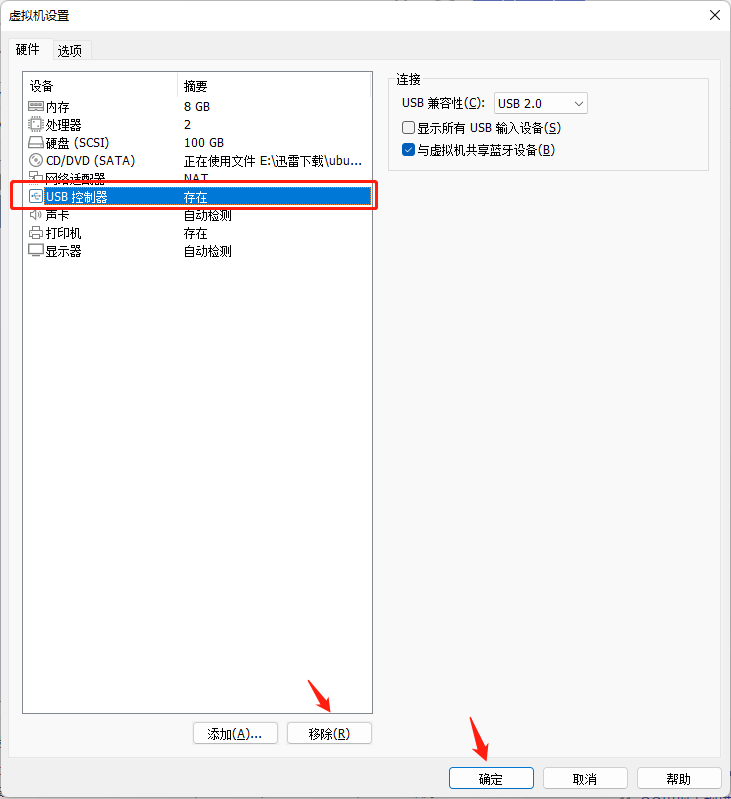
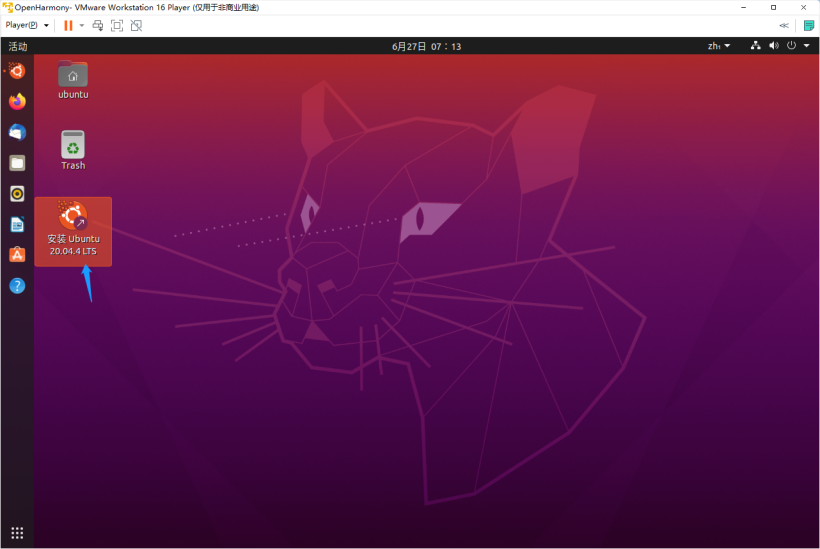
名为OpenHarmony的Ubuntu虚拟机创建成功。
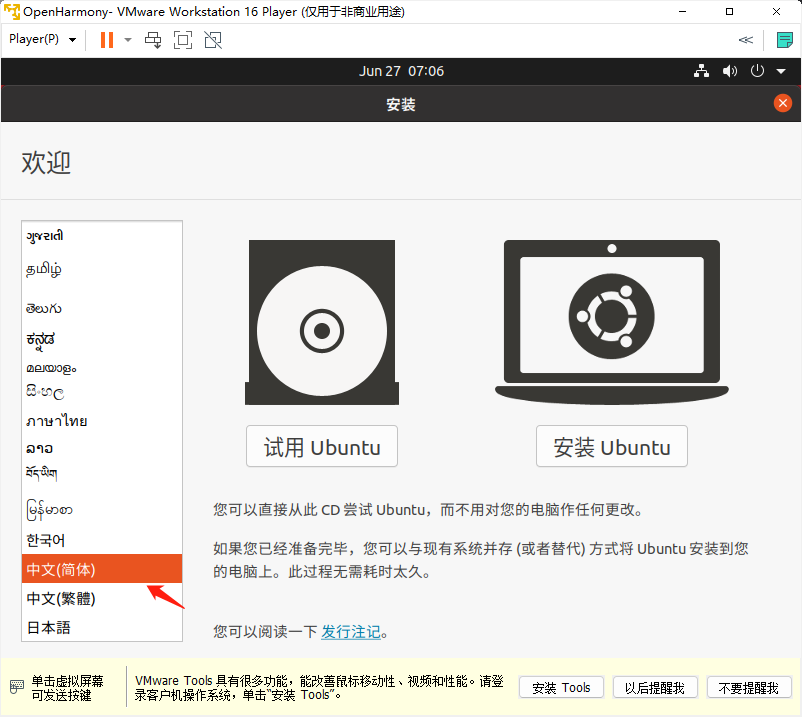
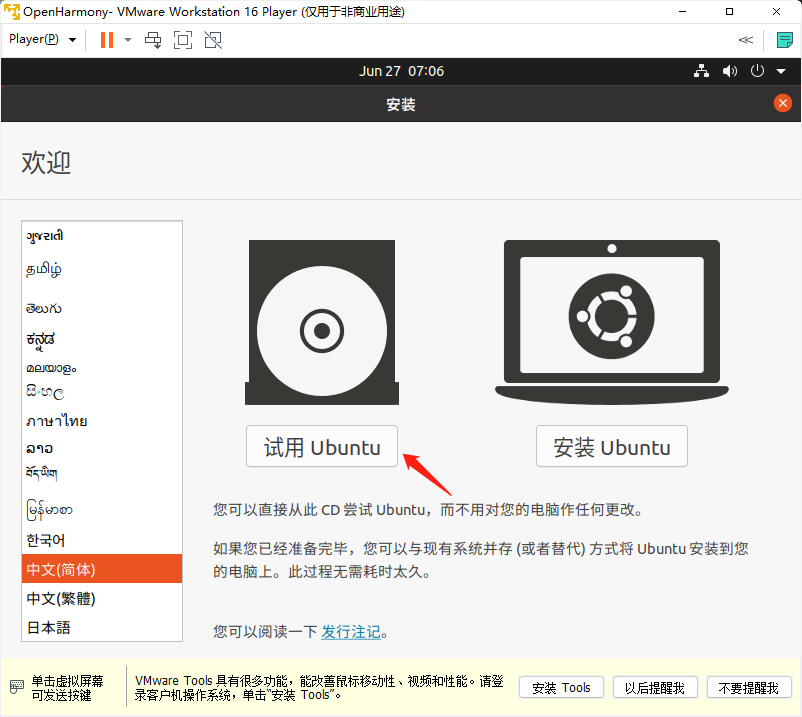
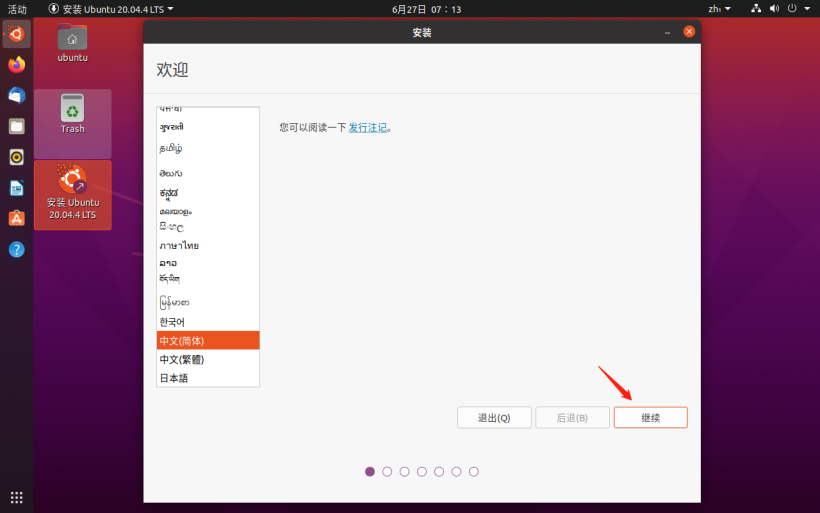
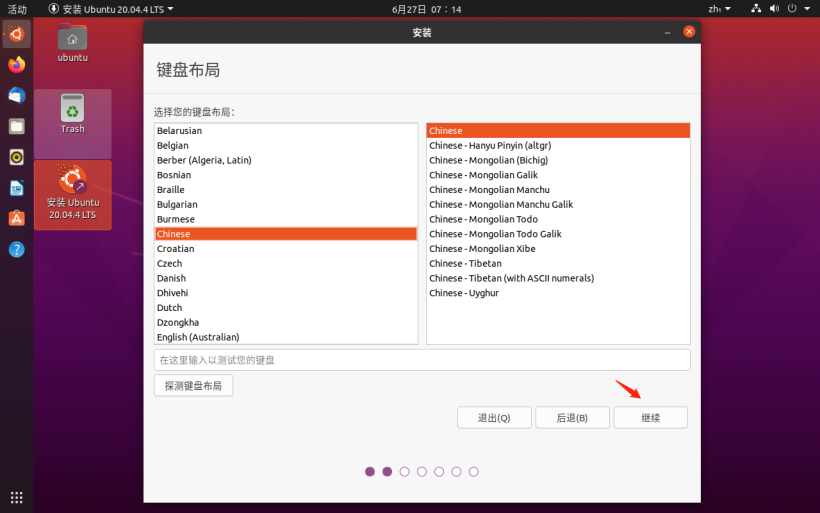
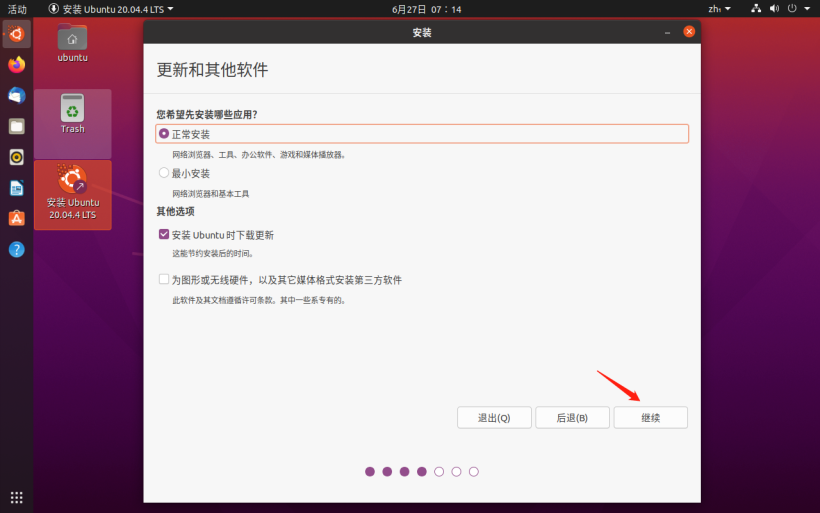
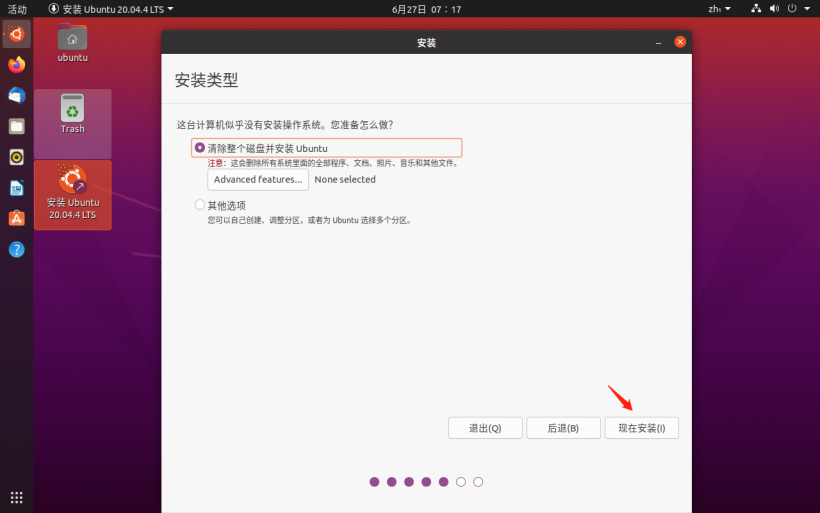
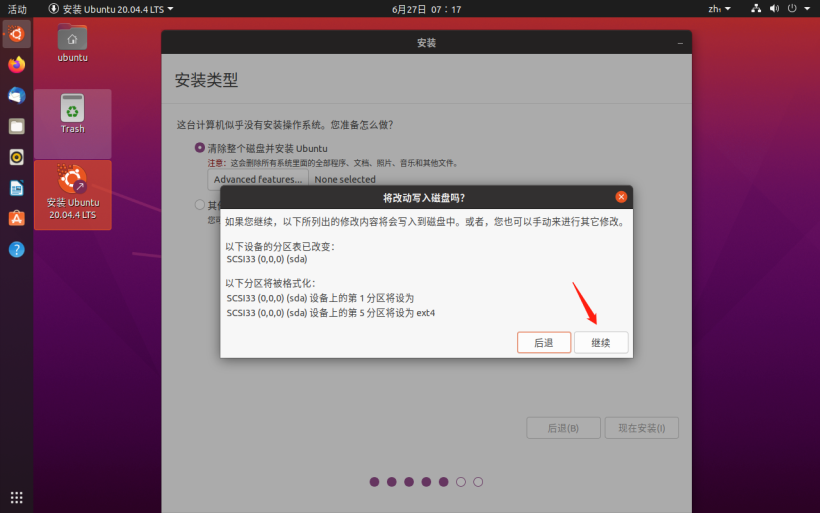
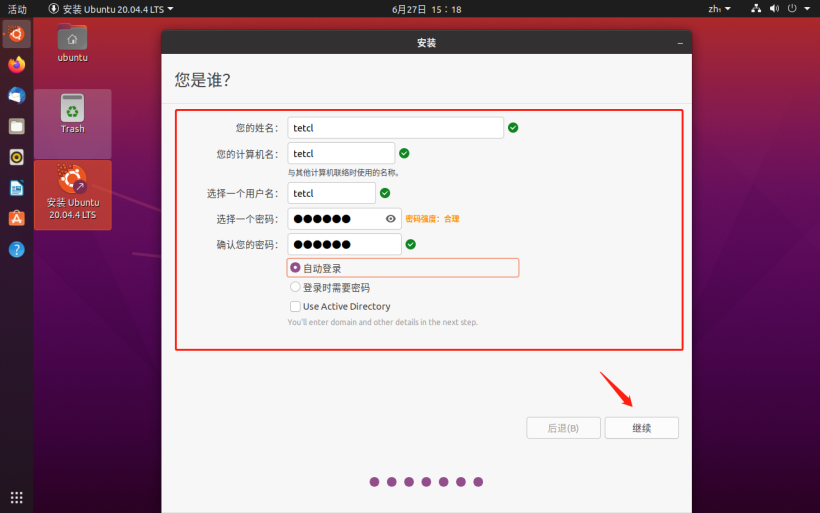
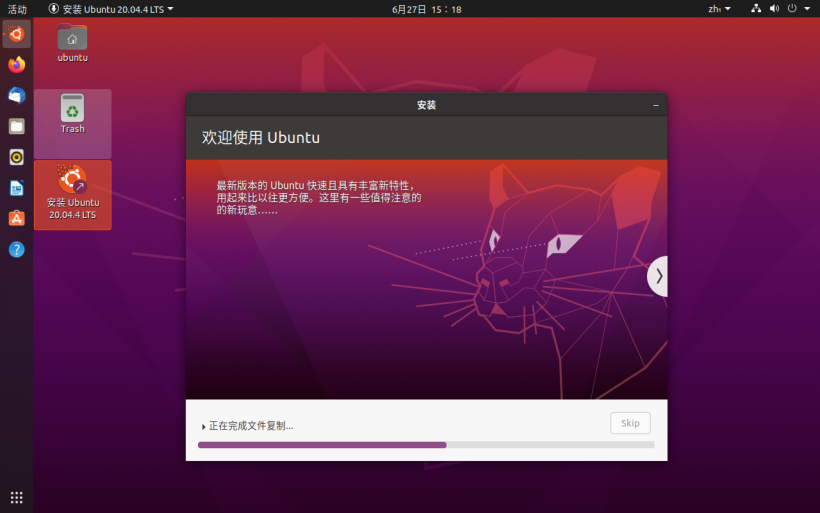
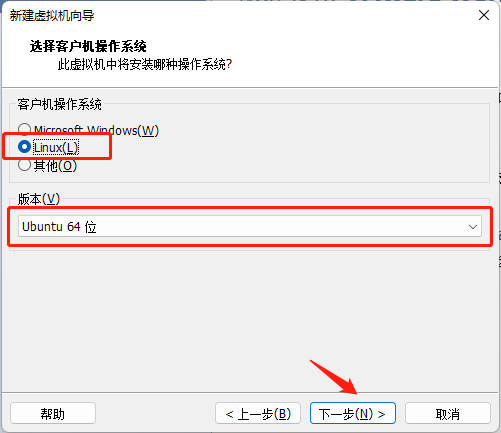
Ubuntu操作系统安装成功。
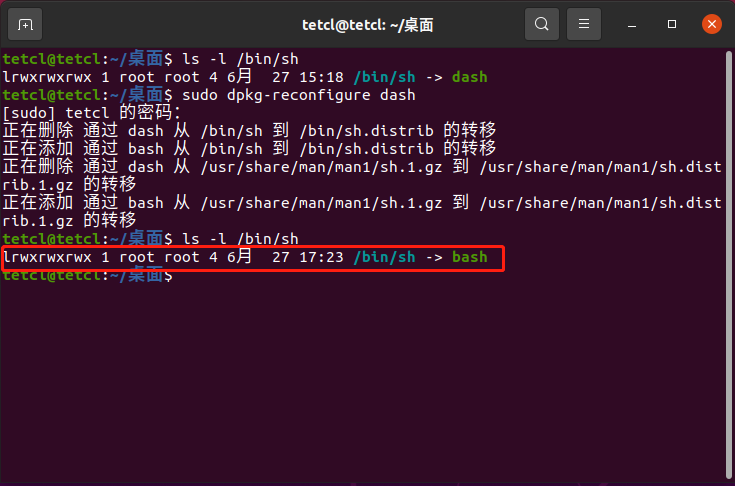
a. 执行命令查看是否为bash,如果不是则按照[b]操作,若是则跳过。

b. 执行命令,将Shell由dash改为bash。

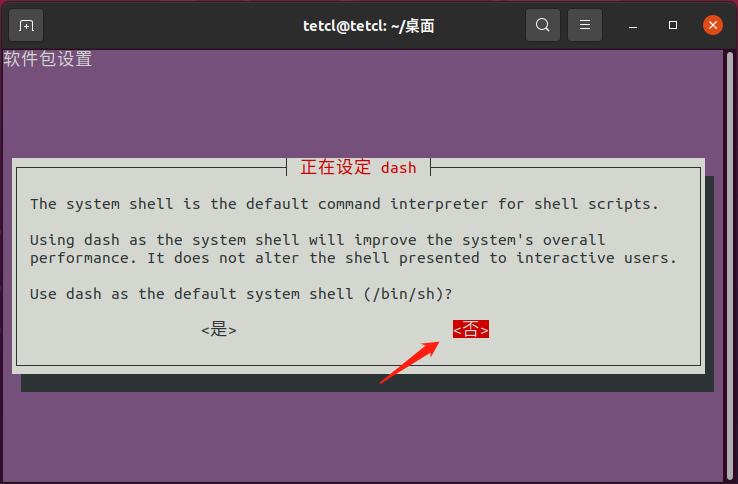
c. 更改成功。
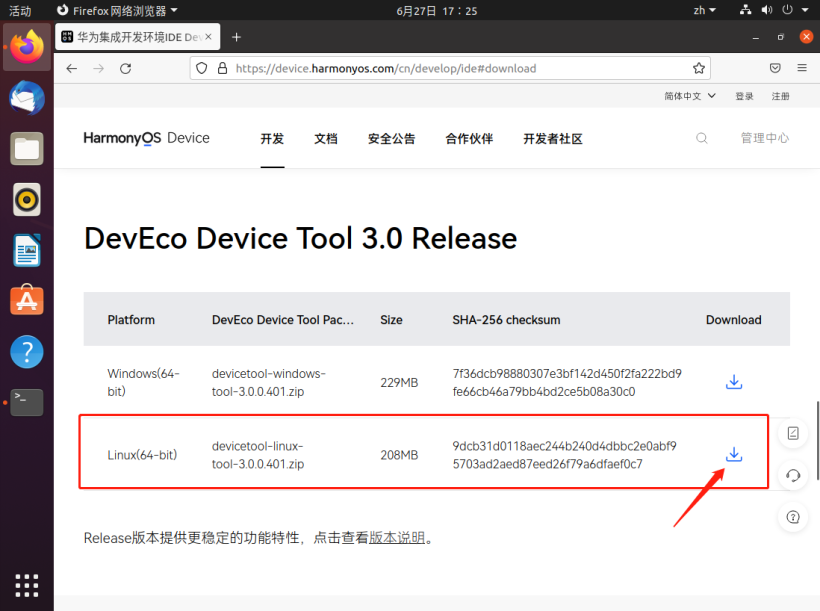
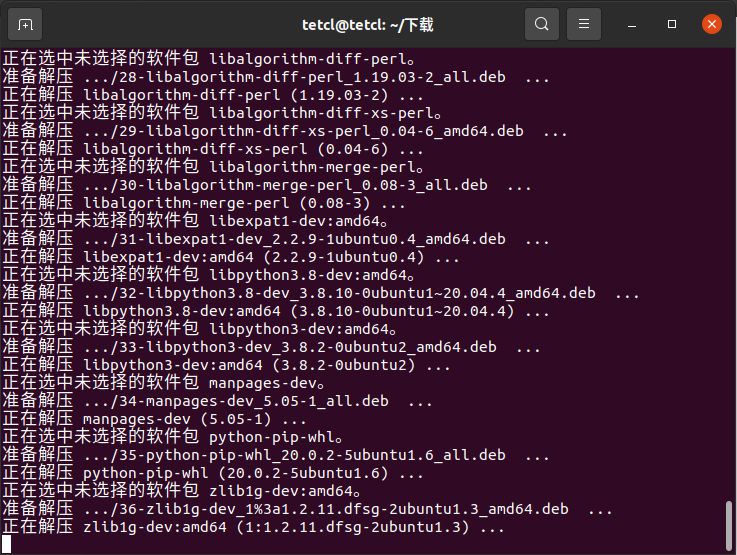
unzip devicetool-linux-tool-3.0.0.401.zip
chmod u+x devicetool-linux-tool-3.0.0.401.sh
chmod u+x devicetool-linux-tool-3.0.0.401.sh
sudo ./devicetool-linux-tool-3.0.0.401.sh

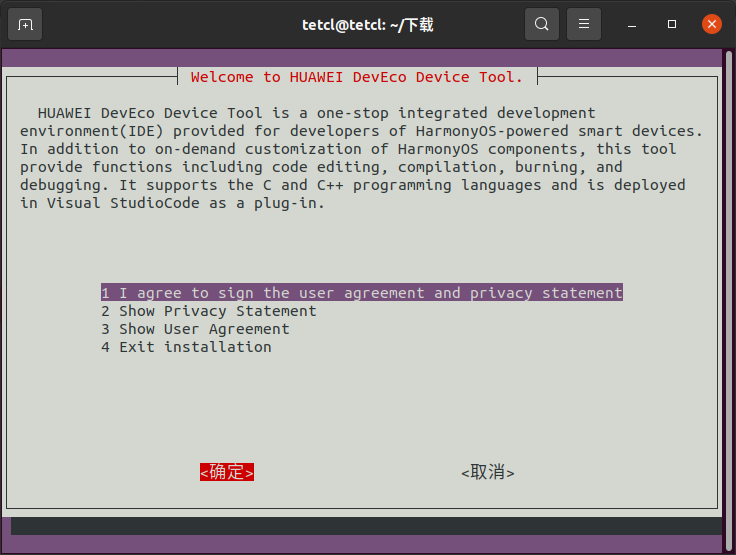
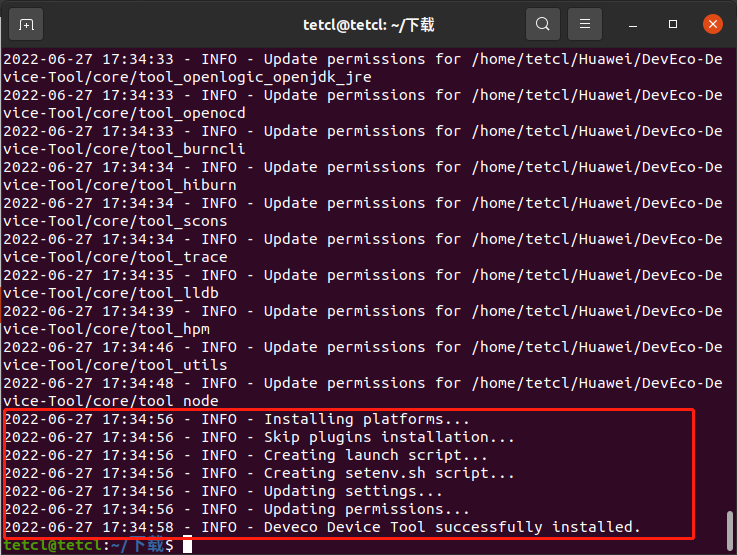
等待安装完成。
出现图中红框内容,则表示安装成功。
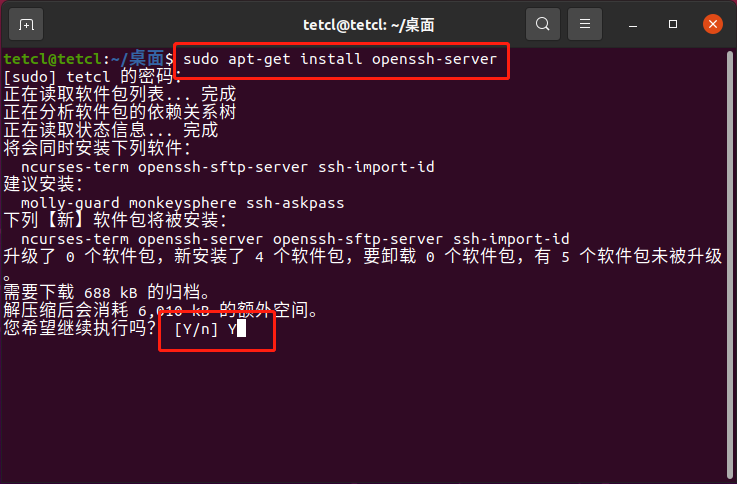
a. 执行命令sudo apt-get install openssh-server安装SSH服务。
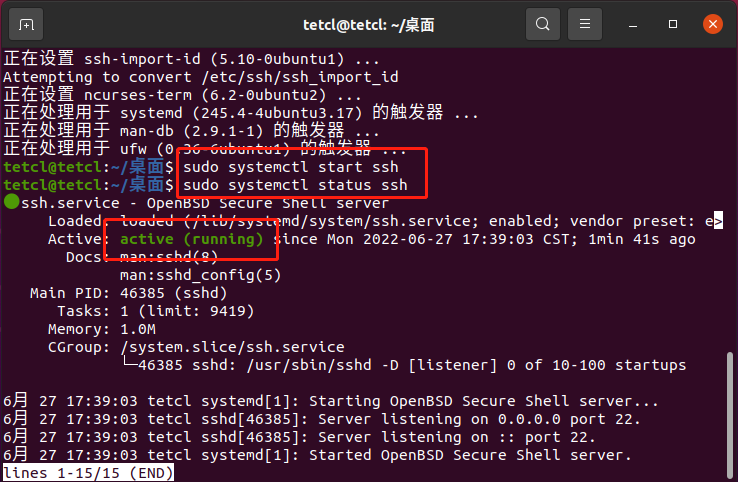
b. 执行命令sudo systemctl start ssh启动SSH服务,执行命令sudo systemctl status ssh查看状态,为active(running)则启动成功。
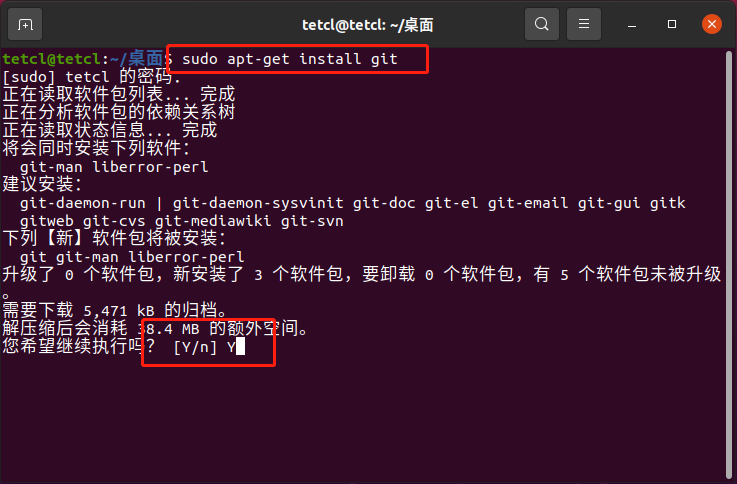
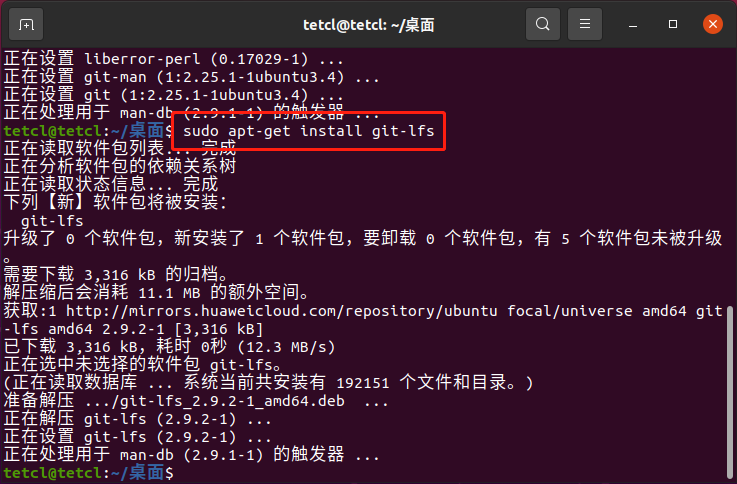
a. 执行命令sudo apt-get install git git-lfs安装git客户端和git-lfs。
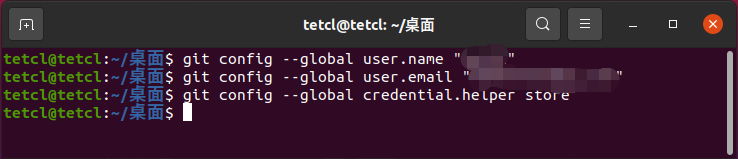
b. 配置用户信息。
git config --global user.name "yourname"
git config --global user.email "your-email-address"
git config --global credential.helper store
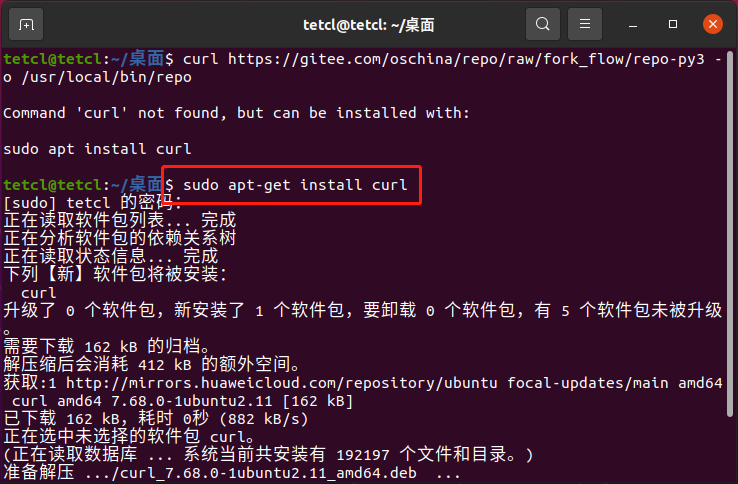
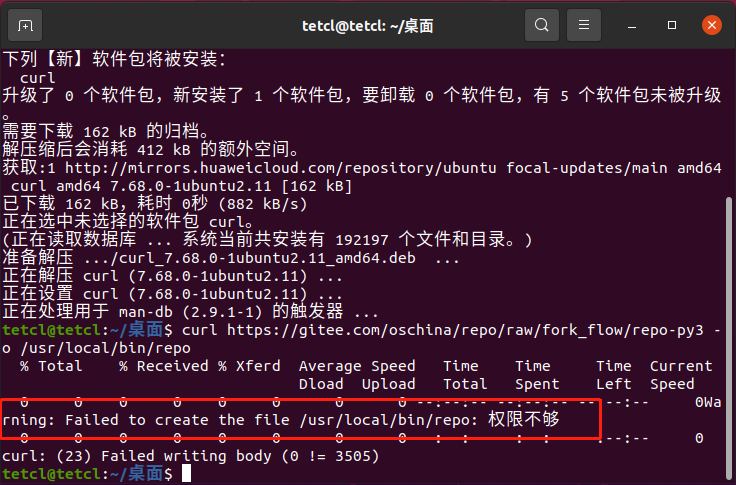
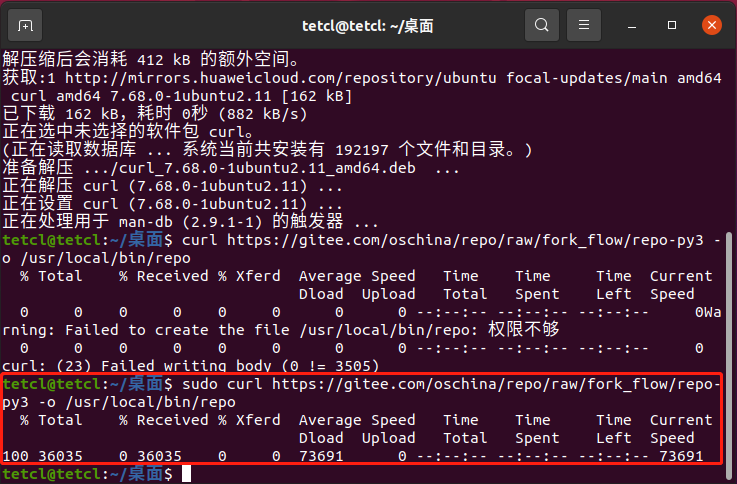
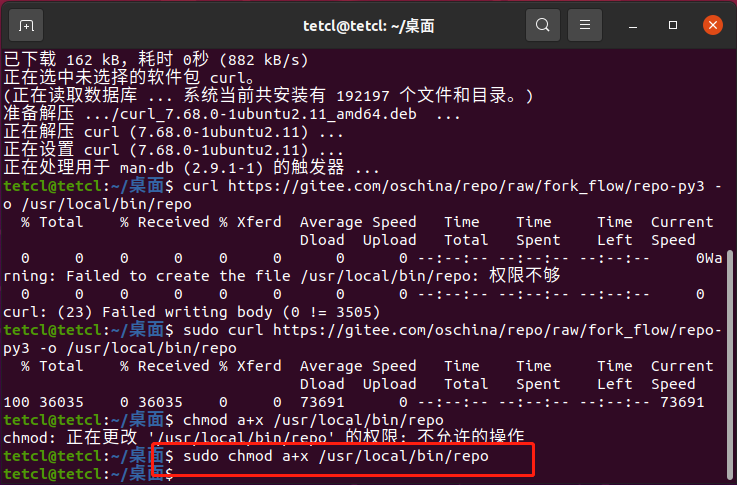
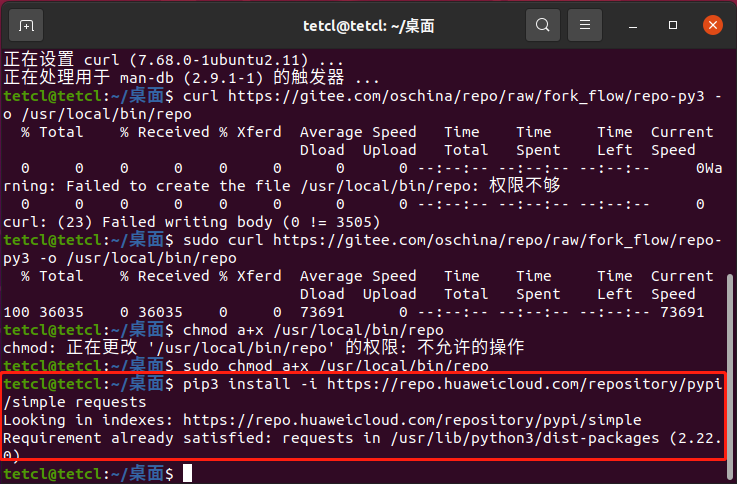
c. 安装码云repo工具。
curl https://gitee.com/oschina/repo/raw/fork_flow/repo-py3 -o /usr/local/bin/repo #如果没有权限,可下载至其他目录,并将其配置到环境变量中
chmod a+x /usr/local/bin/repo
pip3 install -i https://repo.huaweicloud.com/repository/pypi/simple requests
如果提示 Command 'curl' not found, but can be installed with: sudo apt install curl 则执行命令 sudo apt-get install curl 安装 curl。
若提示权限不够,则在命令前加sudo。
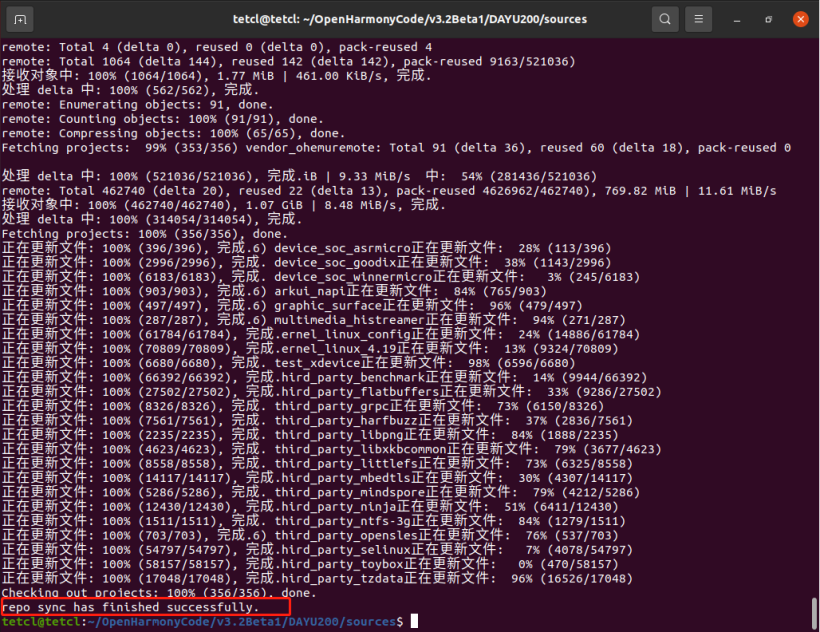
d. 使用repo+https下载发布Tag节点源码。
- 创建源码存放目录。
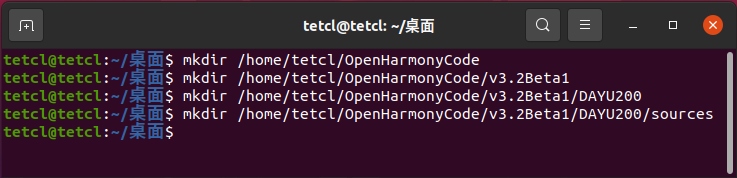
- 进入创建的源码存放目录,执行以下命令下载源码。
repo init -u https://gitee.com/openharmony/manifest -b refs/tags/OpenHarmony-v3.2-Beta1 --no-repo-verify
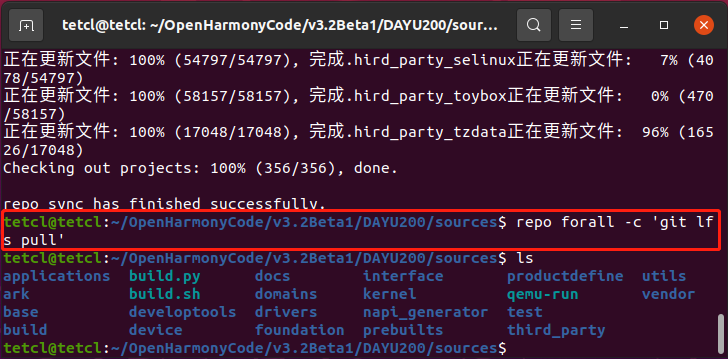
repo sync -c
repo forall -c 'git lfs pull'
提示/usr/bin/env: "python": 没有那个文件或目录,则执行命令sudo ln -sf /usr/bin/python3 /usr/bin/python创建一个链接。
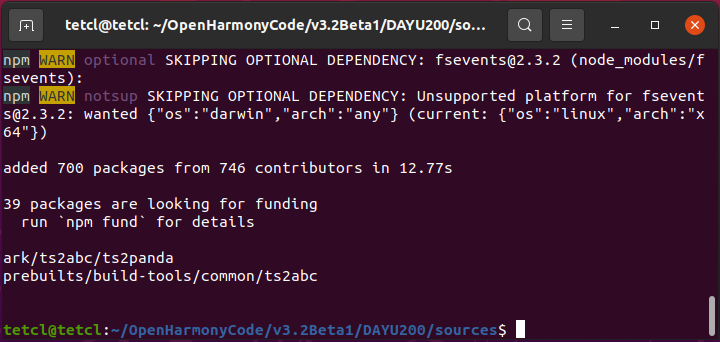
e. 在源码目录下执行bash build/prebuilts_download.sh安装编译器及二进制工具。
a. 点击devicetools-windows-tool-xxx.exe打开安装向导。
b. 选择安装位置。
c. 同时安装VSCode。
d. 选择python路径(如果安装过),没有安装,则选择下载安装。
e. 选择其他组件,默认即可。
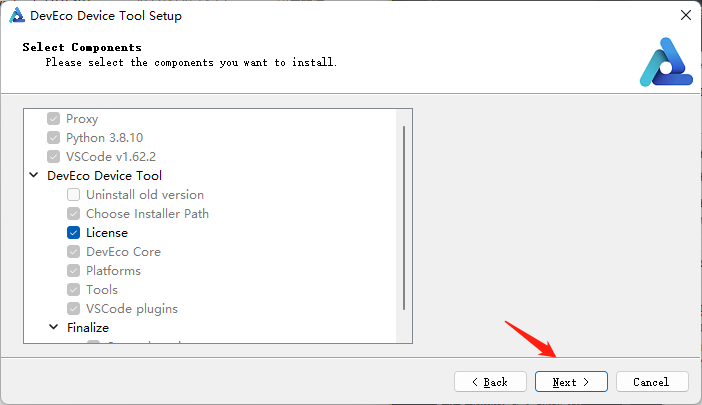
f. 接受协议。
g. 等待安装完成,安装过程会弹出python安装界面,切勿操作。
h. 完成安装。
i. 打开VSCode,等待检查更新完成后重启。
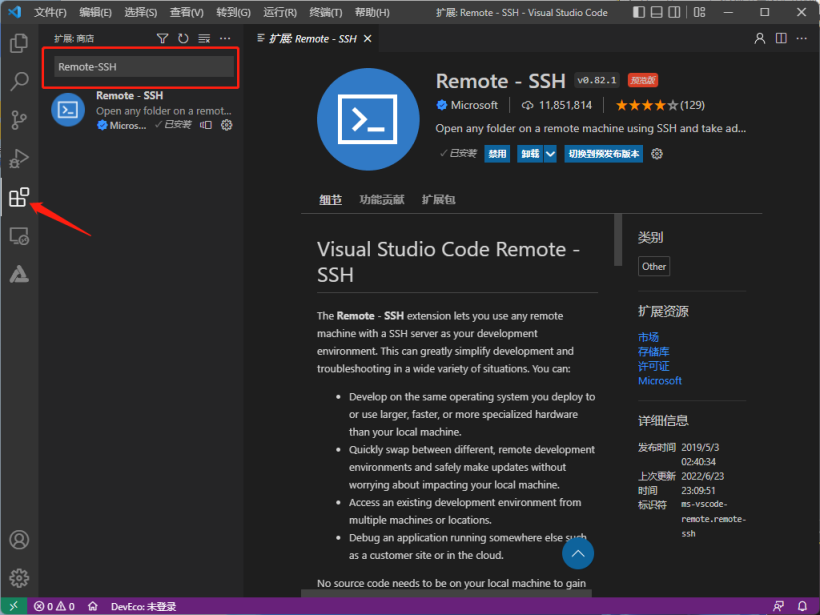
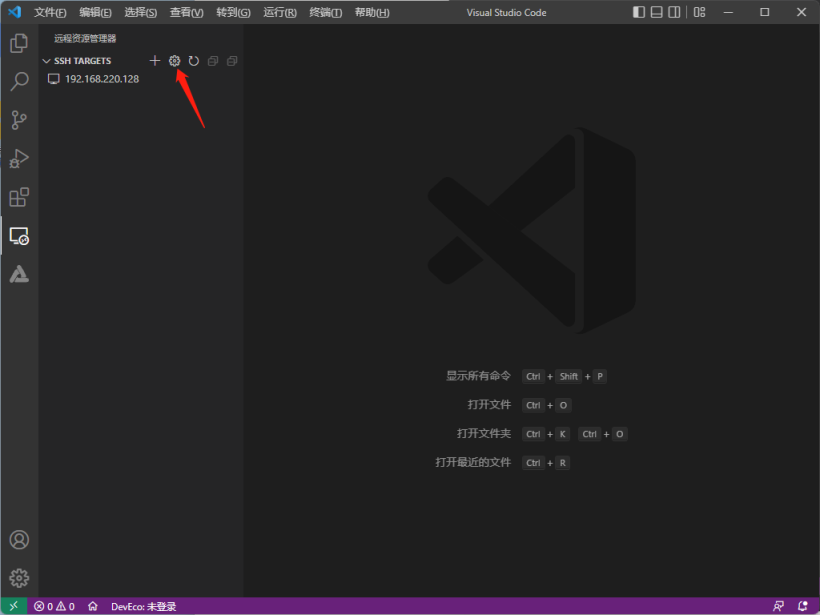
a. 在左侧扩展中搜索Remote-SSH,并安装。
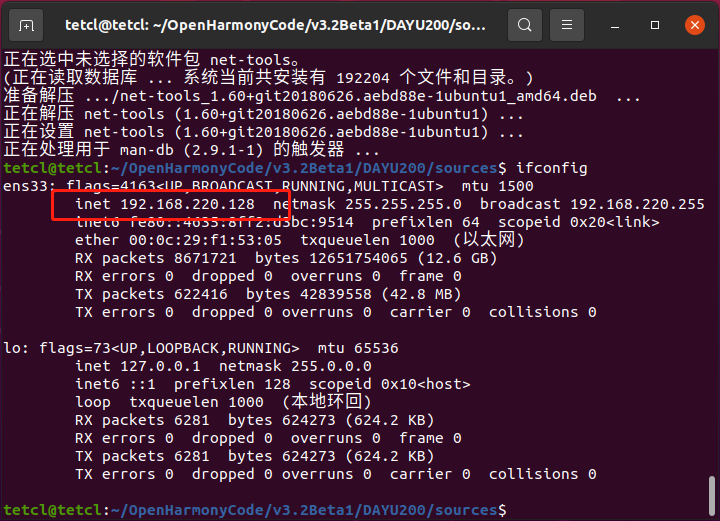
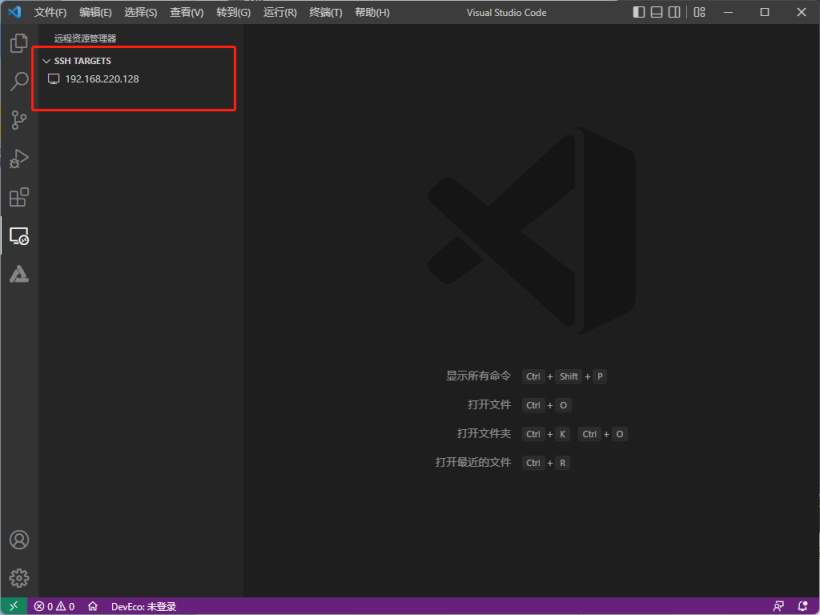
b. 配置Ubuntu远程连接。
在Ubuntu虚拟机中执行ifconfig获取虚拟机IP地址,若提示Command 'ifconfig' not found, but can be installed with: sudo apt install net-tools则执行sudo apt-get install net-tools命令,然后再次执行ifconfig获取虚拟机IP地址。
c. 输入远程连接信息ssh tetcl@192.168.220.128 -A。

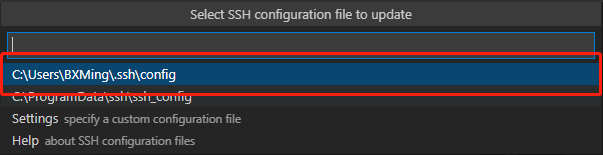
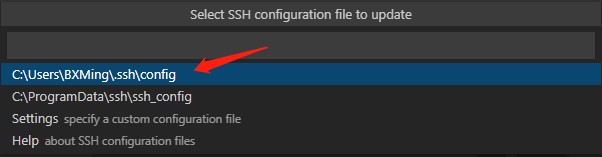
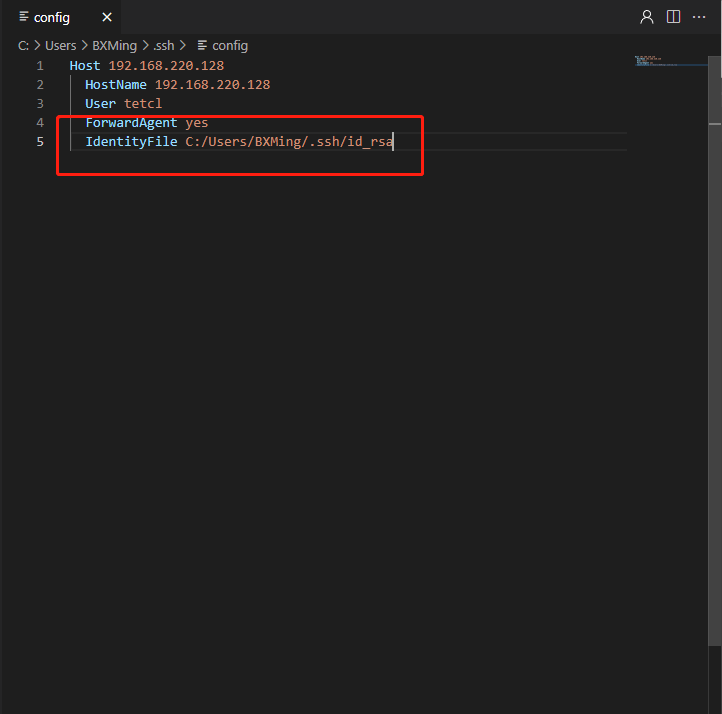
d. 选择配置文件。
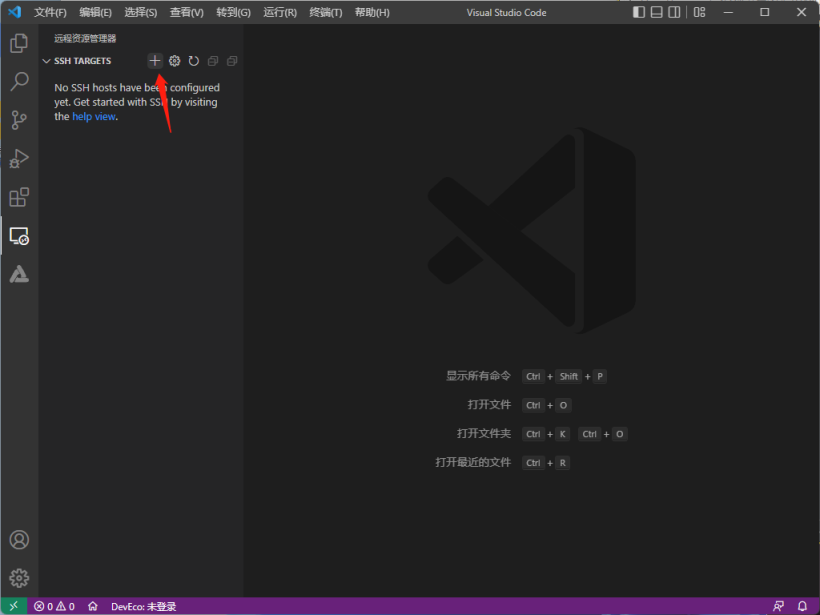
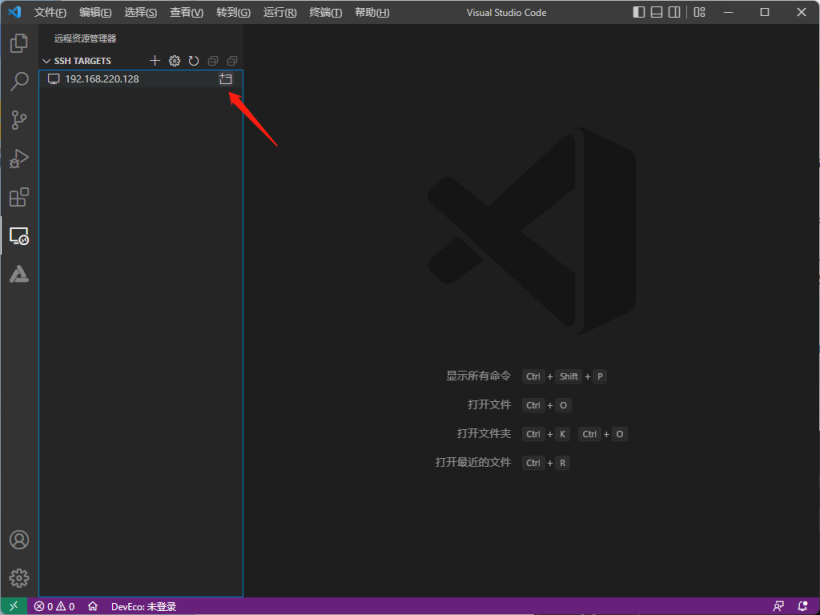
e. 在远程资源管理器中出现刚才配置的IP地址时,则配置成功。
a. 选择Linux。

b. 选择Continue。

c. 输入设置的password(两个字竟然是敏感信息)。

若提示DevEco Device Tool需要重载,则点击重载即可。
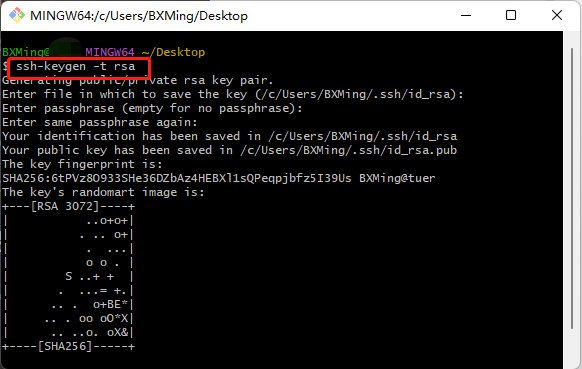
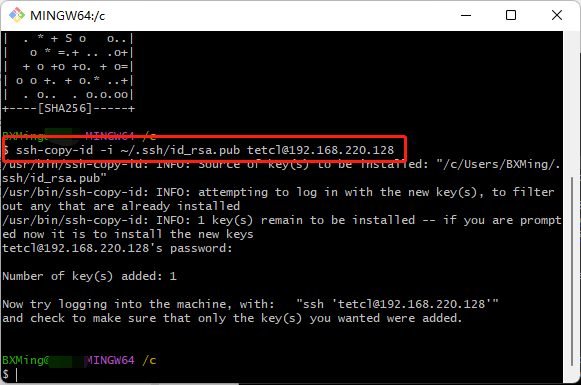
a. 打开Git bash命令(如果没有安装,则安装Git),执行命令,生成SSH公钥。
ssh-keygen -t rsa
ssh-copy-id -i ~/.ssh/id_rsa.pub tetcl@192.168.220.128
b. 配置公钥。
c. 断开连接,重新连接远程Ubuntu,需要输入配置SSH Key时输入的password。

OpenHarmony标准系统环境准备完毕。
a. 打开VSCode, 首先连接远程虚拟机,然后点击左侧DevEco,主界面 --> 主页 --> 导入工程。
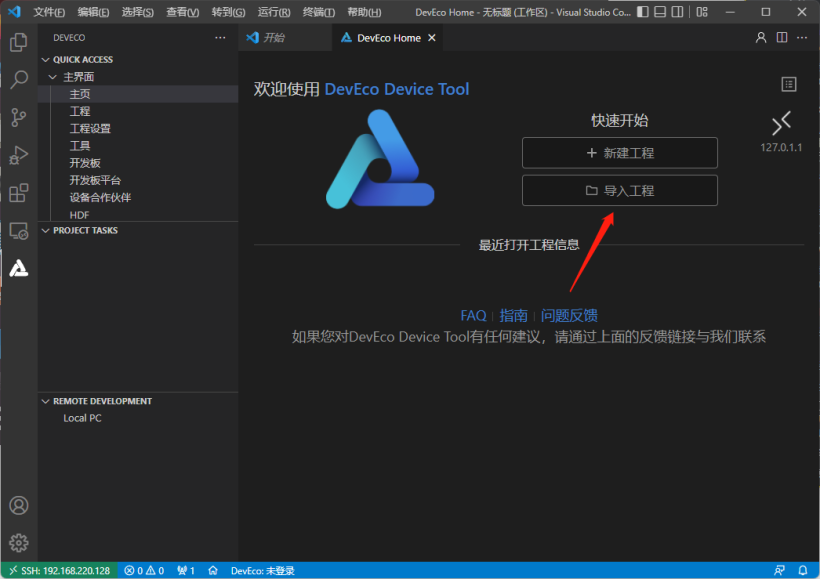
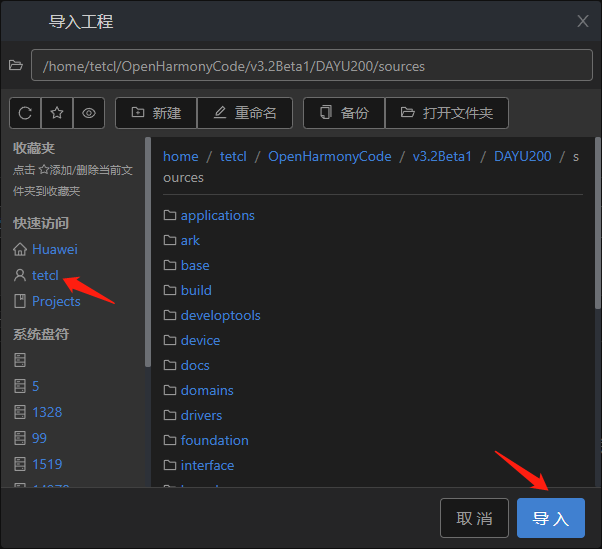
b. 导入工程界面快速访问选择虚拟机(tetcl),选择源码所在目录。
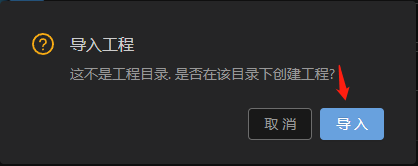
c. 首次导入时,会出现如下提示框,点击导入。
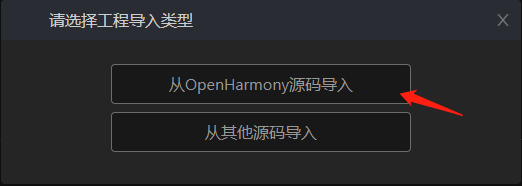
d. 在选择工程导入类型界面中选择从OpenHarmony源码导入。
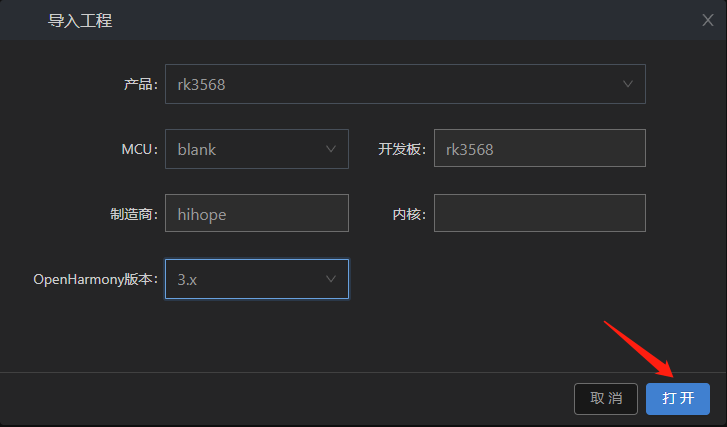
e. 导入工程界面中,产品选择hihope下的rk3568,OpenHarmony版本选择3.x,其他默认。
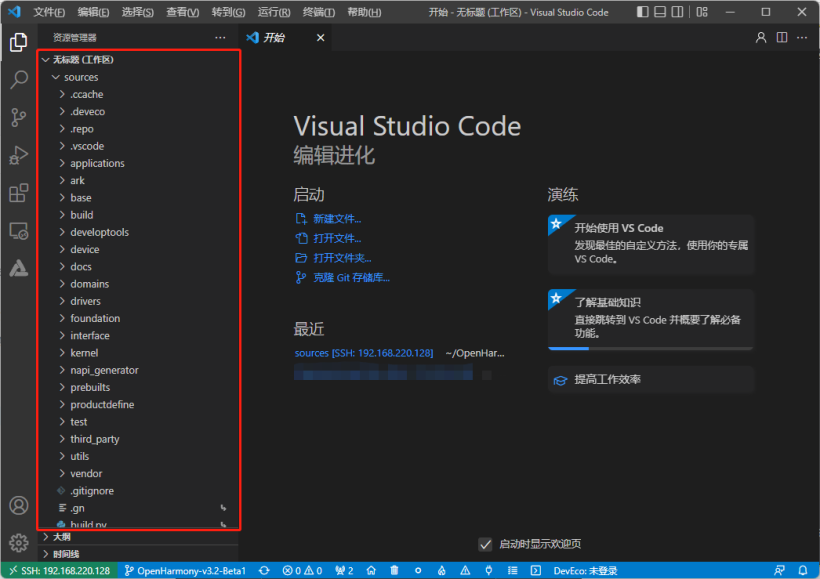
f. 打开源码,将在资源管理器下看到源码目录结构。
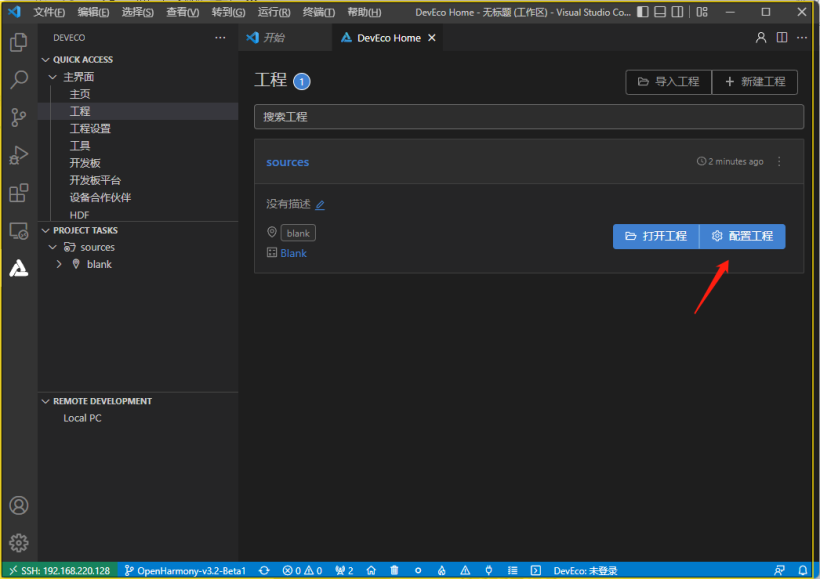
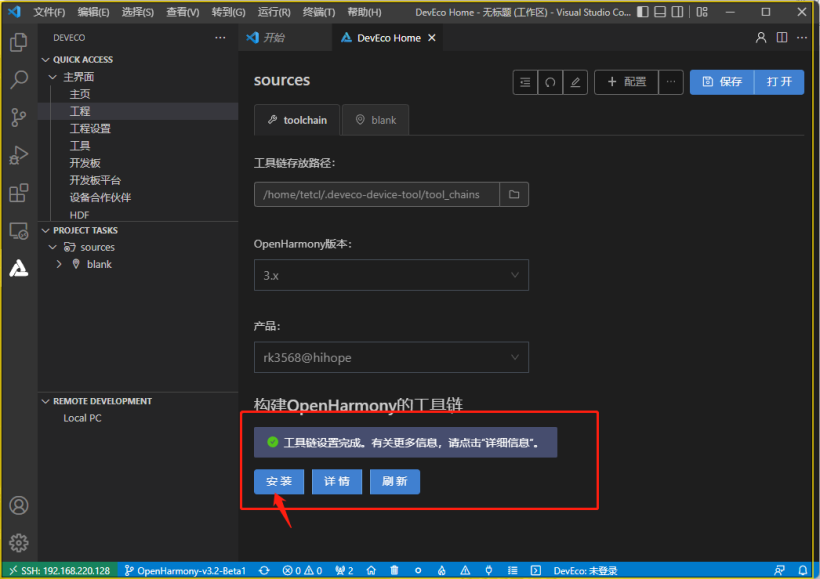
a. 打开主界面工程,点击配置工程。
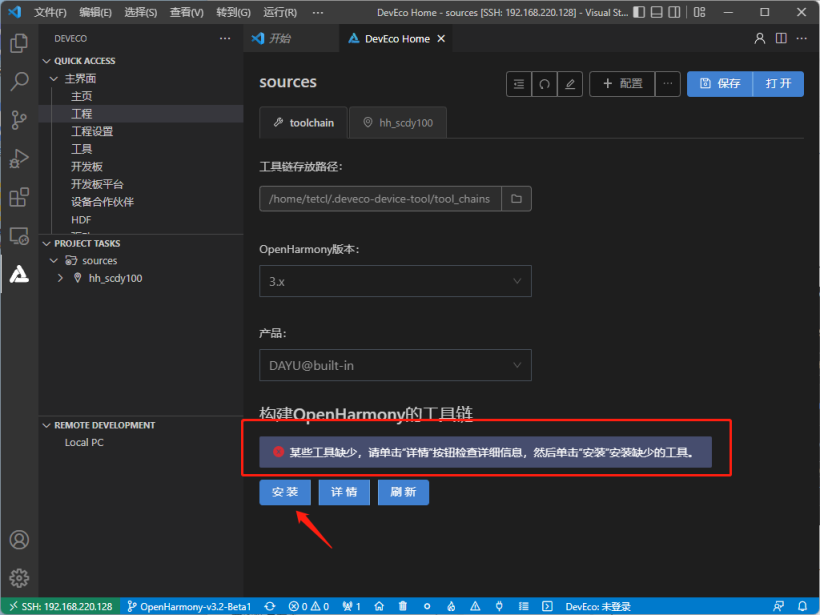
c. 在toolchain页签中,会自动检测依赖的编译工具链是否完备,如果提示部分工具链缺失,点击安装即可自动安装。
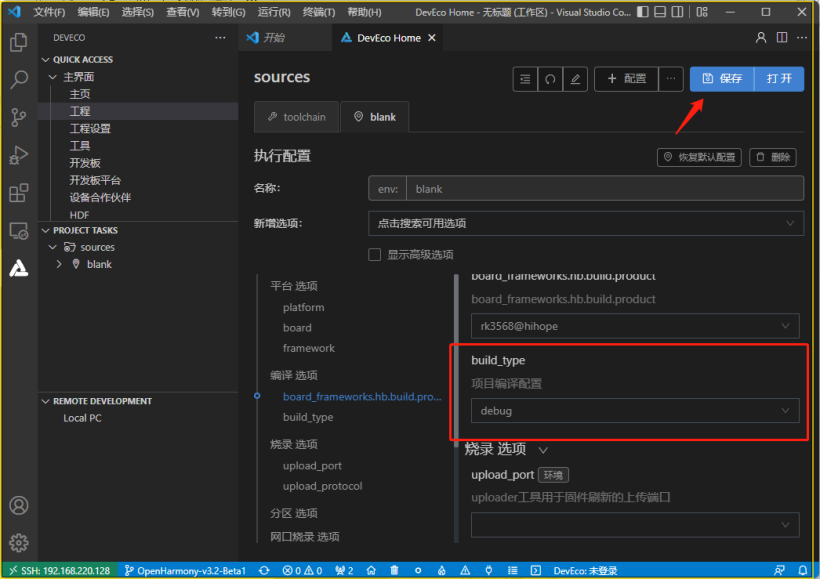
c. 在blank配置页中,设置源码的编译类型build_type,默认即可,然后单击右上角保存按钮。
d. 在PROJECT TASKS中,点击对应的开发板下的Build进行编译。
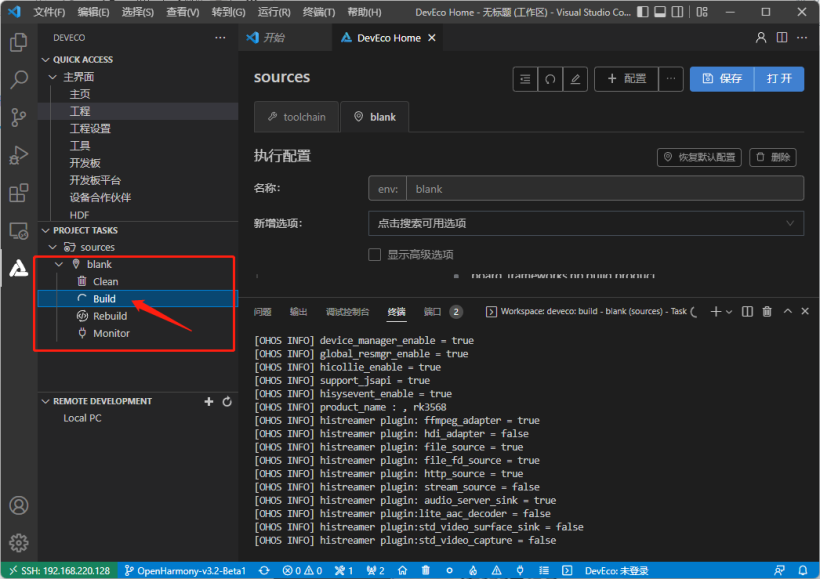
e. 编译成功后,会在out目录下输出对应开发板所需的镜像文件。
a. 打开瑞芯微烧录工具。
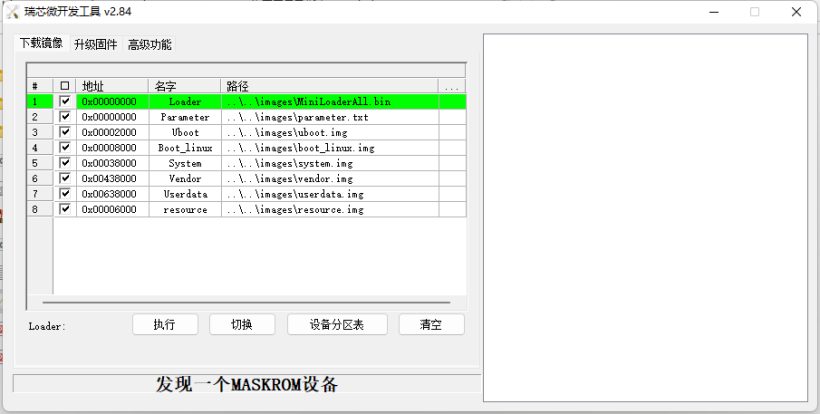
b. 将编译好的镜像文件拷贝到windows磁盘中。
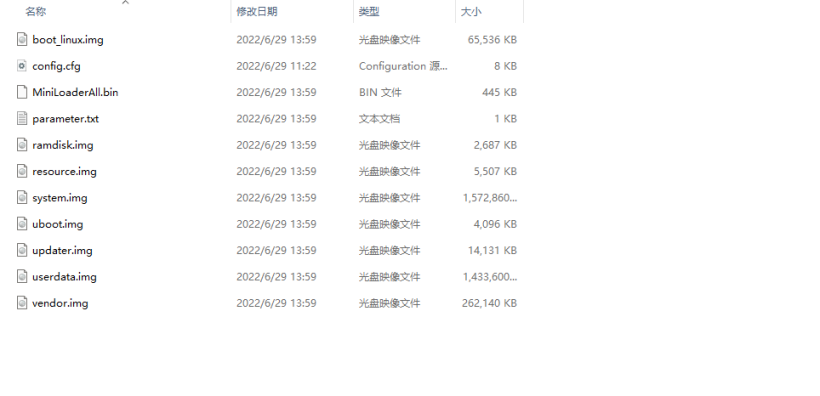
c. 在瑞芯微烧录工具加载镜像窗口右键导入配置(并更改文件所在路径,确保能够找到)。
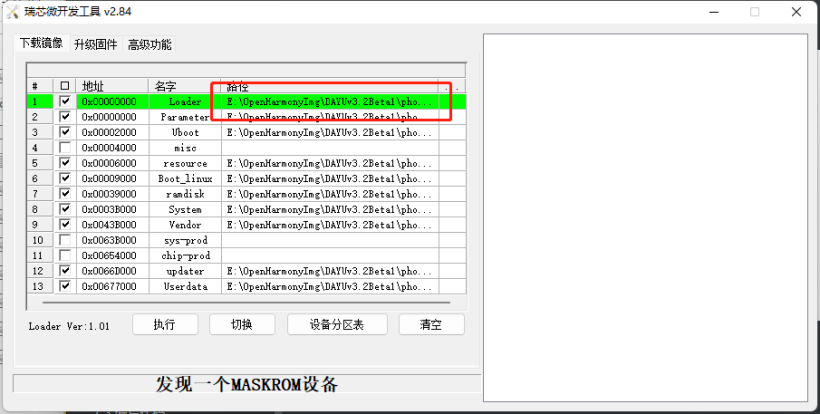
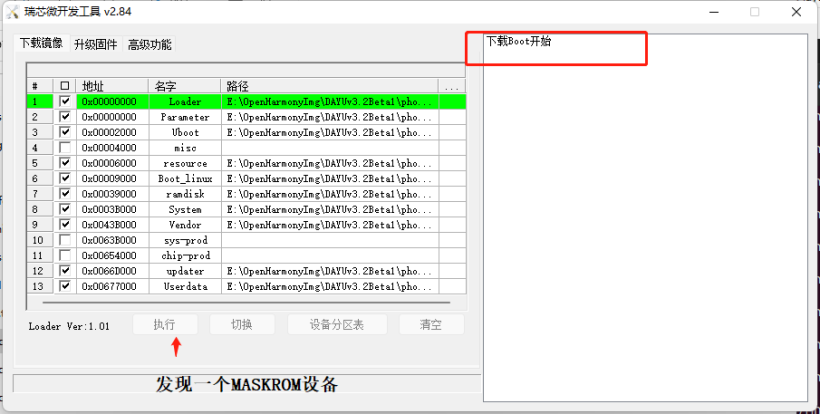
d. 连接开发板,长按更新键,然后按RESET按键,再点击瑞芯微烧录工具中的执行,在右侧会显示下载Boot,然后松开更新键,等待烧录完成。
// ScreenShot/entry/src/main/ets/MainAbility/pages/index.ets
import screenshot from '@ohos.screenshot';
// screenshot.save()返回的是PixelMap,因此需要导入
import image from '@ohos.multimedia.image';
import screenshot from '@ohos.screenshot';
// screenshot.save()返回的是PixelMap,因此需要导入
import image from '@ohos.multimedia.image';
a. module.json5中配置权限。
// ScreenShot/entry/src/main/module.json5
{
 "requestPermissions": [
 {
 "name": "ohos.permission.CAPTURE_SCREEN"
 }
 ],
}
b. 因为screenshot是system_core等级,不仅仅需要在config.json中配置,还要修改profile文件中配置(Sdk/toolchains/版本/lib/UnsgnedReleasedProfileTemplate.json&UnsgnedDebugProfileTemplate.json)。

c. 配置完成后,对应用进行签名。
// MainAbility.ts onWindowStageCreate()
 onWindowStageCreate(windowStage) {
 // Main window is created, set main page for this ability
 console.log("[Demo] MainAbility onWindowStageCreate")
 var context = this.context;
 let array: Array<string> = ['ohos.permission.CAPTURE_SCREEN'];
 context.requestPermissionsFromUser(array).then((data) => {
 console.log('ScreenShot ---> MainAbility ---> data type: ' + typeof(data));
 console.log('ScreenShot ---> MainAbility ---> data: ' + JSON.stringify(data));
 console.log('ScreenShot ---> MainAbility ---> data permissions: ' + data.permissions);
 console.log('ScreenShot ---> MainAbility ---> data result: ' + data.authResults);
 }).catch(err => {
 console.error('ScreenShot ---> MainAbility ---> err: ' + JSON.stringify(err));
 })
 windowStage.setUIContent(this.context, "pages/index", null)
 }
onWindowStageCreate(windowStage) {
// Main window is created, set main page for this ability
console.log("[Demo] MainAbility onWindowStageCreate")
var context = this.context;
let array: Array<string> = ['ohos.permission.CAPTURE_SCREEN'];
context.requestPermissionsFromUser(array).then((data) => {
console.log('ScreenShot ---> MainAbility ---> data type: ' + typeof(data));
console.log('ScreenShot ---> MainAbility ---> data: ' + JSON.stringify(data));
console.log('ScreenShot ---> MainAbility ---> data permissions: ' + data.permissions);
console.log('ScreenShot ---> MainAbility ---> data result: ' + data.authResults);
}).catch(err => {
console.error('ScreenShot ---> MainAbility ---> err: ' + JSON.stringify(err));
})
windowStage.setUIContent(this.context, "pages/index", null)
}
// 获取屏幕截图
screenshot.save(options?: ScreenShotOptions, callback: AsyncCallback<image.PixelMap>):void
screenshot.save(options?: ScreenShotOptions): Promise<image.PixelMap>
// 设置截图图像的信息
ScreenShotOptions = {
 screenRect: {
 "left": 200,
 "top": 100,
 "width": 200,
 "height": 200
 }, // 表示截图图像的区域,不传值默认为全屏
 imageSize: {
 "width": 300,
 "height": 300
 }, // 表示截取图像的大小,不传值默认为全屏
 rotation: 0, // 表示截图图像的旋转角度,当前仅支持输入值为0,默认值为0
 displayId: 0// 表示截图图像的显示设备Display的ID号,API8以上
}
getScreen = (isFullScreen: boolean) => {
 let options: screenshot.ScreenshotOptions = {
 screenRect: { left: 0, top: 0, width: 400, height: 400 },
 imageSize: { width: 400, height: 400 },
 rotation: 0,
 displayId: 0
 }
 if (isFullScreen) {
 options = {
 rotation: 0
 }
 }
 screenshot.save(options, (err, data: image.PixelMap) => {
 if (err) {
 console.error('ScreenShot --> error: ' + JSON.stringify(err));
 return;
 }
 console.info('ScreenShot --> data: ' + JSON.stringify(data));
 this.image = data;
 })
 }
screenshot.save(options?: ScreenShotOptions, callback: AsyncCallback<image.PixelMap>):void
screenshot.save(options?: ScreenShotOptions): Promise<image.PixelMap>
// 设置截图图像的信息
ScreenShotOptions = {
screenRect: {
"left": 200,
"top": 100,
"width": 200,
"height": 200
}, // 表示截图图像的区域,不传值默认为全屏
imageSize: {
"width": 300,
"height": 300
}, // 表示截取图像的大小,不传值默认为全屏
rotation: 0, // 表示截图图像的旋转角度,当前仅支持输入值为0,默认值为0
displayId: 0// 表示截图图像的显示设备Display的ID号,API8以上
}
let options: screenshot.ScreenshotOptions = {
screenRect: { left: 0, top: 0, width: 400, height: 400 },
imageSize: { width: 400, height: 400 },
rotation: 0,
displayId: 0
}
if (isFullScreen) {
options = {
rotation: 0
}
}
screenshot.save(options, (err, data: image.PixelMap) => {
if (err) {
console.error('ScreenShot --> error: ' + JSON.stringify(err));
return;
}
console.info('ScreenShot --> data: ' + JSON.stringify(data));
this.image = data;
})
}


© 版权声明
文章版权归作者所有,未经允许请勿转载。