
文章目录
- 根据上一步分析结果,编写gn文件,将三方库加入到OpenHarmony的编译体系。
OpenHarmony编译构建子系统提供了一个基于Gn和ninja的编译构建框架。根据产品配置,编译生成对应的镜像包。其中编译构建流程为:
使用Gn配置构建目标。
Gn运行后会生成ninja文件。
通过运行ninja来执行编译任务。
- 本次移植时在openharmony3.2Beta1版本上运行的,所以需要准备openharmony3.2Beta1的源码。 先在Widows上安装虚拟机,在虚拟机上安装Ubuntu18.04或者20.04。笔者使用的为Ubuntu20.04。 1、将Ubuntu Shell环境修改为bash。 打开终端执行 sudo dpkg-reconfigure dash 将Shell由dash改为bash。 选择<否> 更改成功如下: 2、下载华为集成开发环境 DevEco Device Tool Linux版本,目前最新版本号为3.1.0.200。 HUAWEI DevEco Device Tool(以下简称DevEco Device Tool)是OpenHarmony面向智能设备开发者提供的一站式集成开发环境,支持OpenHarmony的组件按需定制,支持代码编辑、编译、烧录和调试等功能,支持C/C++语言,以插件的形式部署在Visual Studio Code上。 直接在Ubuntu上打开firefox输入下载地址下载。 解压DevEco Device Tool安装包,并对解压后的文件赋权。 unzip devicetool-linux-tool-3.1.0.200.zipchmod u+x devicetool-linux-tool-3.1.0.200.sh 安装DevEco Device。 执行命令安装DevEco Device。 sudo ./devicetool-linux-tool-3.1.0.200.sh 终端打印出这条信息说明安装成功。 3、获取标准系统源码。 执行命令sudo apt-get install git git-lfs安装git客户端和git-lfs。 配置git用户信息 git config --global user.name "yourname"git config --global user.email "your-email-address"git config --global credential.helper store git config --global credential.helper store执行这个命令会在本地生成一个文本,上边记录配置。然后再拉取代码就不用再输入账号信息了。 进入gitee官网个人主页,个人头像下方就是user.name。 再进入设置点击邮箱管理就可以得到你的your-email-address。 安装gitee码云repo工具。 sudo apt-get install curlsudo curl https://gitee.com/oschina/repo/raw/fork_flow/repo-py3 -o /usr/local/bin/reposudo chmod a+x /usr/local/bin/reposudo pip3 install -i https://repo.huaweicloud.com/repository/pypi/simple requests 使用repo+https下载发布Tag节点源码。 创建源码存放目录。 进入创建的源码存放目录,执行以下命令下载源码。 sudo ln -sf /usr/bin/python3 /usr/bin/pythonrepo init -u https://gitee.com/openharmony/manifest -b refs/tags/OpenHarmony-v3.2-Beta1 --no-repo-verifyrepo sync -crepo forall -c 'git lfs pull' 4、在源码目录下执行脚本安装编译器及二进制工具。 下载的prebuilts二进制默认存放在与OpenHarmony同目录下的OpenHarmony_2.0_canary_prebuilts下。 bash build/prebuilts_download.sh 5、安装依赖工具。 sudo apt-get install binutils git git-lfs gnupg flex bison gperf build-essential zip curl zlib1g-dev gcc-multilib g++-multilib libc6-dev-i386 lib32ncurses5-dev x11proto-core-dev libx11-dev lib32z1-dev ccache libgl1-mesa-dev libxml2-utils xsltproc unzip m4 bc gnutls-bin python3.8 python3-pip ruby 6、最后测试一下OpenHarmony三方库编译环境。 在源码根目录下执行编译命令。 ./build.sh --product-name rk3568 --ccache --build-target=要编译的部件名 --target-cpu arm64#其中:--product-name rk3568 指定产品名为rk3568 #其中:--ccache 编译使用ccache#其中:--target-cpu arm64 编译构建64位系统 在源码目录下执行编译zlib命令,生成libzlib.z.so。 ./build.sh --product-name rk3568 --ccache --build-target=zlib 编译生成了libzlib.z.so,编译环境没问题。
- 下载完openharmony3.2Beta1源码后,将speexdsp的源码拷贝到openhamony的third_party目录下。 在OpenHarmony/sources/third_party/speexdsp和OpenHarmony/sources/third_party/speexdsp/libspeexdsp下分别编写一份BUILD.gn文件,完成speexdsp的gn及测试用例的gn化。测试用例指的是测试speexdsp功能的程序。
- OpenHarmony/sources/third_party/speexdsp下添加BUILD.gn文件。 OpenHarmony/sources/third_party/speexdsp/BUILD.g内容如下: import("//build/ohos.gni") config("speexdsp_nowarn_config"){ cflags = [ "-Wno-implicit-function-declaration", "-Wno-pointer-sign", "-Wno-unused-variable", ]}config("speexdsp_cflag_config"){ cflags = [ "-g", "-O2", "-fvisibility=hidden", "-DHAVE_CONFIG_H", ] ldflags = [ "-lm" ]}ohos_shared_library("speexdsp_share") { sources = [ "libspeexdsp/preprocess.c", "libspeexdsp/jitter.c", "libspeexdsp/mdf.c", "libspeexdsp/fftwrap.c", "libspeexdsp/filterbank.c", "libspeexdsp/resample.c", "libspeexdsp/buffer.c", "libspeexdsp/scal.c", "libspeexdsp/smallft.c", ] defines = [ "NL_DEBUG", "speexdsp_EXPORTS", ] configs = [ ":speexdsp_cflag_config", ":speexdsp_nowarn_config" ] include_dirs = [ ".", "libspeexdsp", "include" ] part_name = "speexdsp"}
- OpenHarmony/sources/third_party/speexdsp/libspeexdsp下添加BUILD.gn文件。 import("//build/ohos.gni")config("test_nowarn_config"){ cflags = [ "-Wno-sign-compare", "-Wno-pointer-sign" ]}config("speexdsp_cflag_config") { ldflags = [ "-lm" ] cflags_cc = [ "-g", "-O2", "-fvisibility=hidden", ]}config("speexdsp_config") { include_dirs = [ "//third_party/speexdsp/include" ]}ohos_executable("testdenoise"){ public_configs = [ ":speexdsp_config", ":test_nowarn_config" ] sources = [ "testdenoise.c" ] configs = [ ":speexdsp_cflag_config", ] deps = [ "//third_party/speexdsp:speexdsp_share" ] part_name = "speexdsp"}ohos_executable("testecho"){ public_configs = [ ":speexdsp_config", ":test_nowarn_config" ] sources = [ "testecho.c" ] configs = [ ":speexdsp_cflag_config" ] deps = [ "//third_party/speexdsp:speexdsp_share" ] part_name = "speexdsp"}ohos_executable("testjitter"){ public_configs = [ ":speexdsp_config", ":test_nowarn_config" ] sources = [ "testjitter.c" ] configs = [ ":speexdsp_cflag_config" ] deps = [ "//third_party/speexdsp:speexdsp_share" ] part_name = "speexdsp"}ohos_executable("testresample"){ public_configs = [ ":speexdsp_config", ":test_nowarn_config" ] sources = [ "testresample.c" ] configs = [ ":speexdsp_cflag_config" ] deps = [ "//third_party/speexdsp:speexdsp_share" ] part_name = "speexdsp"}ohos_executable("testresample2"){ public_configs = [ ":speexdsp_config", ":test_nowarn_config" ] sources = [ "testresample2.c" ] configs = [ ":speexdsp_cflag_config" ] deps = [ "//third_party/speexdsp:speexdsp_share" ] part_name = "speexdsp"}
- 定义子系统并加入到编译框架在系统源码根目录下创建一个目录作为子系统目录,子系统目录可创建在OpenHarmony源码目录任意位置。 本项目以third_party/speexdsp作为为子系统目录,子系统名字即为speexdsp。 子系统speexdsp目录下创建ohos.build文件,build构建时会先读取该文件。 "subsystem": "speexdsp", "parts": { "speexdsp": { "module_list": [ "//third_party/speexdsp/libspeexdsp:testdenoise", "//third_party/speexdsp/libspeexdsp:testecho", "//third_party/speexdsp/libspeexdsp:testjitter", "//third_party/speexdsp/libspeexdsp:testresample", "//third_party/speexdsp/libspeexdsp:testresample2" ], "inner_kits": [ ], "system_kits": [ ], "test_list": [ ] } }} build文件夹下的subsystem_config.json文件,主要包含子系统名称与路径信息,在preloader阶段被加载,根据子系统名称和路径信息查找该路径下的ohos.build文件。 其中需要包含module_list、inner_kits、system_kits、test_list四个部分的声明: module_list:部件包含的模块列表。 inner_kits:部件提供其它部件的接口。 system_kits:部件提供给生成应用的接口。 test_list:部件对应模块的测试用例。
- 接下来把子系统speexdsp配置到build/subsystem_config.json。 "speexdsp": { "path": "third_party/speexdsp", "name": "speexdsp" }, 注意:要求符合json语法规范,要在}前加,(如下图所示):
- 将子系统及其组件加入产品定义中,以rk3568为例,产品定义文件在vendor/hihope/rk3568/config.json,需要将以下内容添加到config.json中: { "subsystem": "speexdsp", "components": [ { "component": "speexdsp", "features": [] } ] }, 想了解更多关于开源的内容,请访问: 51CTO 开源基础软件社区 https://ost.51cto.com。

- 大家好!我来自南京,在OpenHarmony成长计划啃论文俱乐部,与华为、软通动力、润和软件、拓维信息、深开鸿等公司一起,学习和研究操作系统技术,从今年1月11日加入OpenHarmony俱乐部已经有接近8个月时间了。笔者一直在思考啃论文给我带来了些什么,通过啃论文能为OpenHarmony做些什么。笔者利用大二升大三暑假两个月时间移植了Speexdsp这个三方库到OpenHarmony标准系统,而关于前面的问题我似乎找到了答案,现将啃论文和三方库移植分享经验如下:
speexdsp移植后已提交至openhamrony sig仓库:https://gitee.com/openharmony-sig/contest/tree/master/2022_OpenHarmony_thirdparty/speexdsp。
根据上一步分析结果,编写gn文件,将三方库加入到OpenHarmony的编译体系。
OpenHarmony编译构建子系统提供了一个基于Gn和ninja的编译构建框架。根据产品配置,编译生成对应的镜像包。其中编译构建流程为:
- 使用Gn配置构建目标。
- Gn运行后会生成ninja文件。
- 通过运行ninja来执行编译任务。
本次移植时在openharmony3.2Beta1版本上运行的,所以需要准备openharmony3.2Beta1的源码。
先在Widows上安装虚拟机,在虚拟机上安装Ubuntu18.04或者20.04。笔者使用的为Ubuntu20.04。
1、将Ubuntu Shell环境修改为bash。
- 打开终端执行
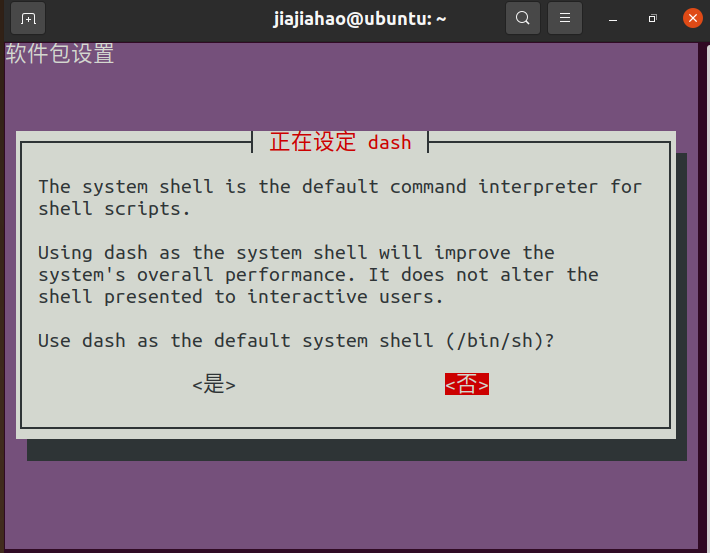
sudo dpkg-reconfigure dash
- 将Shell由dash改为bash。

- 选择<否>
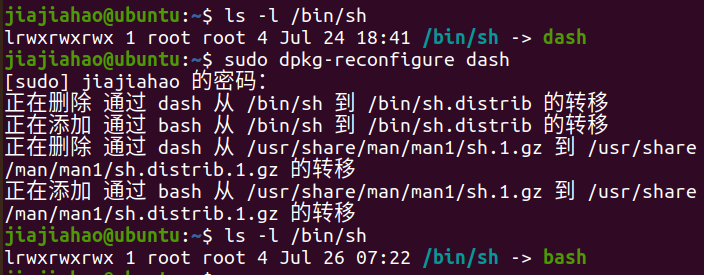
- 更改成功如下:
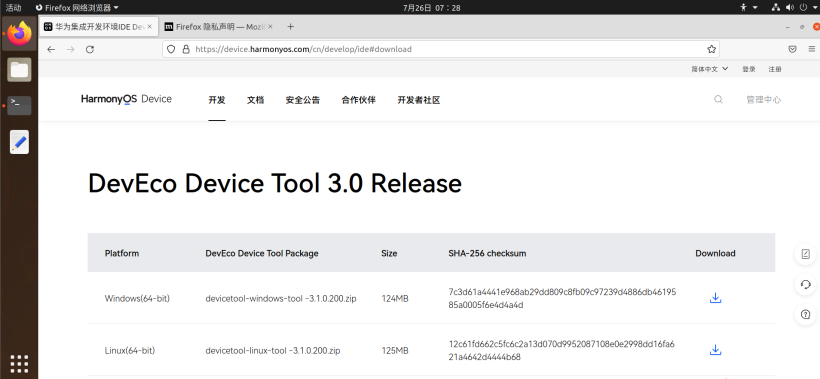
2、下载华为集成开发环境 DevEco Device Tool Linux版本,目前最新版本号为3.1.0.200。
HUAWEI DevEco Device Tool(以下简称DevEco Device Tool)是OpenHarmony面向智能设备开发者提供的一站式集成开发环境,支持OpenHarmony的组件按需定制,支持代码编辑、编译、烧录和调试等功能,支持C/C++语言,以插件的形式部署在Visual Studio Code上。
- 直接在Ubuntu上打开firefox输入下载地址下载。
- 解压DevEco Device Tool安装包,并对解压后的文件赋权。
unzip devicetool-linux-tool-3.1.0.200.zip
chmod u+x devicetool-linux-tool-3.1.0.200.sh

- 安装DevEco Device。
- 执行命令安装DevEco Device。
sudo ./devicetool-linux-tool-3.1.0.200.sh
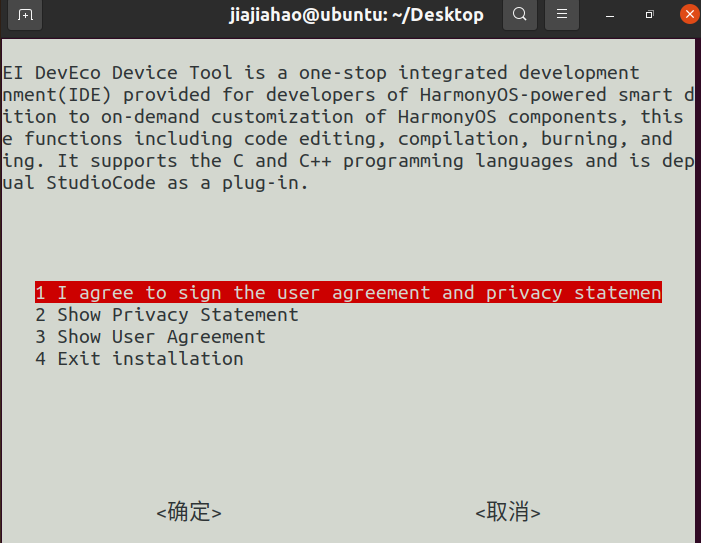
终端打印出这条信息说明安装成功。

3、获取标准系统源码。
执行命令sudo apt-get install git git-lfs安装git客户端和git-lfs。
- 配置git用户信息
git config --global user.name "yourname"
git config --global user.email "your-email-address"
git config --global credential.helper store
git config --global credential.helper store执行这个命令会在本地生成一个文本,上边记录配置。然后再拉取代码就不用再输入账号信息了。
- 进入gitee官网个人主页,个人头像下方就是user.name。
- 再进入设置点击邮箱管理就可以得到你的your-email-address。
- 安装gitee码云repo工具。
sudo apt-get install curl
sudo curl https://gitee.com/oschina/repo/raw/fork_flow/repo-py3 -o /usr/local/bin/repo
sudo chmod a+x /usr/local/bin/repo
sudo pip3 install -i https://repo.huaweicloud.com/repository/pypi/simple requests



- 使用repo+https下载发布Tag节点源码。
创建源码存放目录。
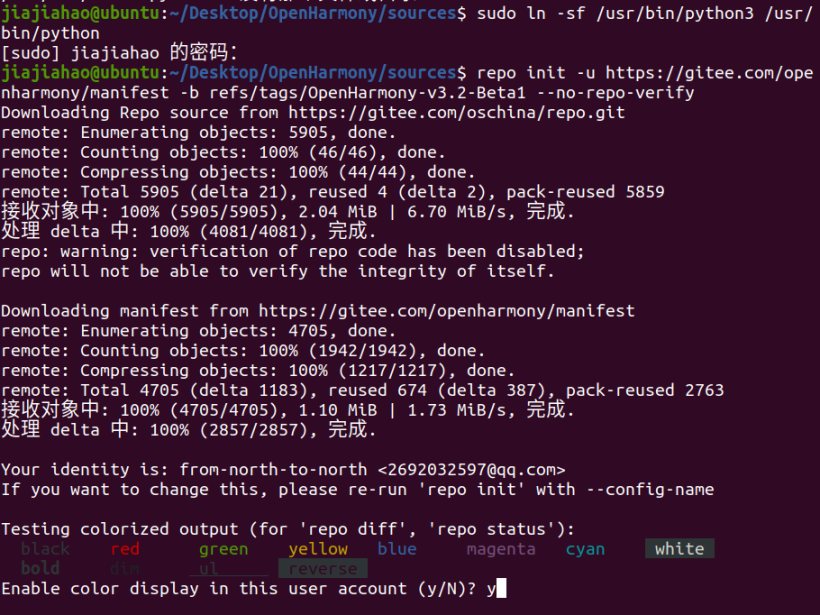
进入创建的源码存放目录,执行以下命令下载源码。
sudo ln -sf /usr/bin/python3 /usr/bin/python
repo init -u https://gitee.com/openharmony/manifest -b refs/tags/OpenHarmony-v3.2-Beta1 --no-repo-verify
repo sync -c
repo forall -c 'git lfs pull'
4、在源码目录下执行脚本安装编译器及二进制工具。
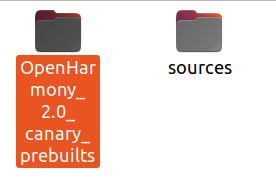
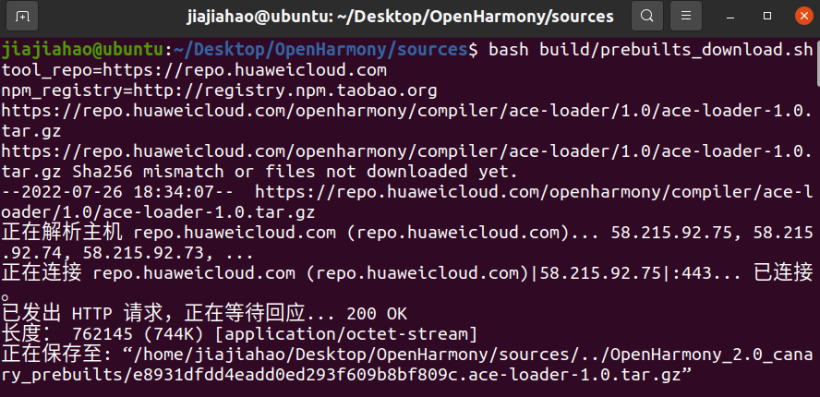
下载的prebuilts二进制默认存放在与OpenHarmony同目录下的OpenHarmony_2.0_canary_prebuilts下。
bash build/prebuilts_download.sh
5、安装依赖工具。
sudo apt-get install binutils git git-lfs gnupg flex bison gperf build-essential zip curl zlib1g-dev gcc-multilib g++-multilib libc6-dev-i386 lib32ncurses5-dev x11proto-core-dev libx11-dev lib32z1-dev ccache libgl1-mesa-dev libxml2-utils xsltproc unzip m4 bc gnutls-bin python3.8 python3-pip ruby
6、最后测试一下OpenHarmony三方库编译环境。
在源码根目录下执行编译命令。
./build.sh --product-name rk3568 --ccache --build-target=要编译的部件名 --target-cpu arm64
#其中:--product-name rk3568 指定产品名为rk3568
#其中:--ccache 编译使用ccache
#其中:--target-cpu arm64 编译构建64位系统
在源码目录下执行编译zlib命令,生成libzlib.z.so。
./build.sh --product-name rk3568 --ccache --build-target=zlib
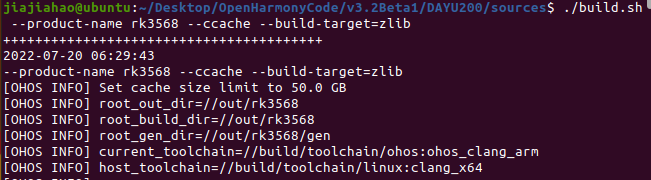
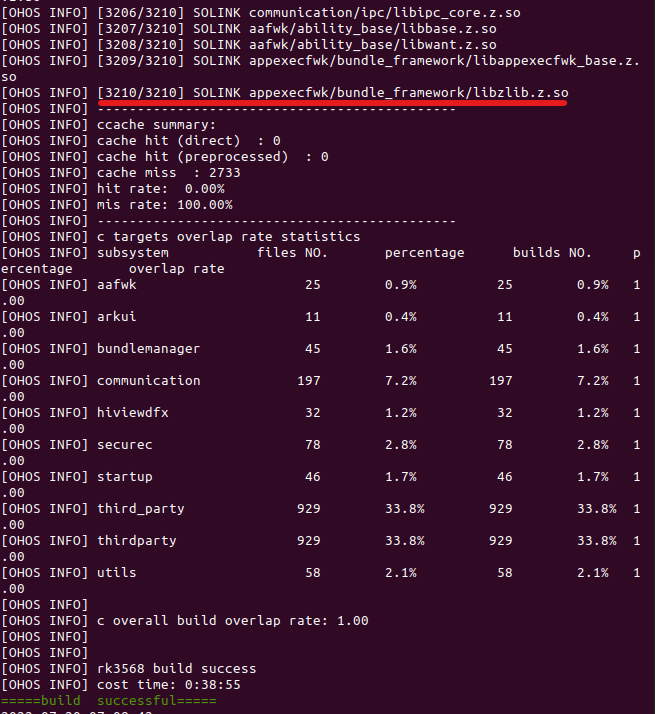
编译生成了libzlib.z.so,编译环境没问题。
下载完openharmony3.2Beta1源码后,将speexdsp的源码拷贝到openhamony的third_party目录下。
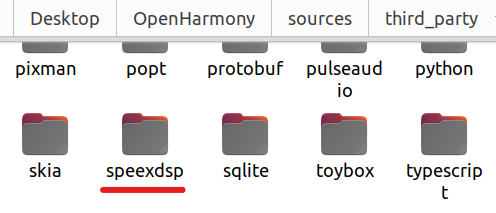
在OpenHarmony/sources/third_party/speexdsp和OpenHarmony/sources/third_party/speexdsp/libspeexdsp下分别编写一份BUILD.gn文件,完成speexdsp的gn及测试用例的gn化。测试用例指的是测试speexdsp功能的程序。
OpenHarmony/sources/third_party/speexdsp下添加BUILD.gn文件。
OpenHarmony/sources/third_party/speexdsp/BUILD.g内容如下:
import("//build/ohos.gni")
config("speexdsp_nowarn_config"){
 cflags = [
 "-Wno-implicit-function-declaration",
 "-Wno-pointer-sign",
 "-Wno-unused-variable",
 ]
}
config("speexdsp_cflag_config"){
 cflags = [
 "-g",
 "-O2",
 "-fvisibility=hidden",
 "-DHAVE_CONFIG_H",
 ]
 ldflags = [
 "-lm"
 ]
}
ohos_shared_library("speexdsp_share") {
 sources = [
 "libspeexdsp/preprocess.c",
 "libspeexdsp/jitter.c",
 "libspeexdsp/mdf.c",
 "libspeexdsp/fftwrap.c",
 "libspeexdsp/filterbank.c",
 "libspeexdsp/resample.c",
 "libspeexdsp/buffer.c",
 "libspeexdsp/scal.c",
 "libspeexdsp/smallft.c",
 ]
 defines = [
 "NL_DEBUG",
 "speexdsp_EXPORTS",
 ]
 configs = [
 ":speexdsp_cflag_config",
 ":speexdsp_nowarn_config"
 ]
 include_dirs = [
 ".",
 "libspeexdsp",
 "include"
 ]
 part_name = "speexdsp"
}
第一行:
import("//build/ohos.gni")
import函数将ohos.gni文件导入到当前作用域。导入的文件是独立执行的,生成的作用域被复制到当前文件中。一个.gni文件会定义构建参数和模板。build目录下ohos.gni文件内容如下:
import("//build/config/sanitizers/sanitizers.gni")
import("//build/ohos/ndk/ndk.gni")
import("//build/ohos/notice/notice.gni")
import("//build/ohos/sa_profile/sa_profile.gni")
import("//build/ohos_var.gni")
import("//build/toolchain/toolchain.gni")
# import cxx base templates
import("//build/templates/cxx/cxx.gni")
if (support_jsapi) {
 import("//build/ohos/ace/ace.gni")
 import("//build/ohos/app/app.gni")
}
import("//build/templates/common/ohos_templates.gni")
# import prebuilt templates
import("//build/templates/cxx/prebuilt.gni")
第三行到第九行:
config("speexdsp_nowarn_config"){
 cflags = [
 "-Wno-implicit-function-declaration",
 "-Wno-pointer-sign",
 "-Wno-unused-variable",
 ]
}
- configs定义了该模块编译配置的环境变量speexdsp_nowarn_config,第24行ohos_shared_library定义了最终生成的模块名,这里代表此模块为最终生成libspeexdsp.z.so。所以在第五行到第七行中config中添加了编译libspeexdsp.z.so需要添加的编译器标志。
- 但是"-Wno-implicit-function-declaration"、“-Wno-pointer-sign”"、-Wno-unused-variable"并非是分析speexdsp原生库得来的cflag编译器标志。
- 而是后来在ohos上编译验证过程中,根据编译报错信息添加的。如果不添加它们,执行./build.sh --product-name rk3568 --ccache --build-target=speexdsp命令后,则无法编译生成openharmony上的运行的libspeexdsp.z.so库,会出现编译警告信息-W-implicit-function-declaration、-W-pointer-sign、-W-unused-variable。解决办法就是在gn化时添加cflag标志"-Wno-implicit-function-declaration"、“-Wno-pointer-sign”“、-Wno-unused-variable”。

clang编译器警告消除:
- 出现警告的就是直接在-W后面加no,比如-Wimplicit-function-declaration改为 -Wno-implicit-function-declaration。
- 还有另外的一种方法:-Wimplicit-function-declaration=no。
第十一到第二十二行:
config("speexdsp_cflag_config"){
 cflags = [
 "-g",
 "-O2",
 "-fvisibility=hidden",
 "-DHAVE_CONFIG_H",

 ]
 ldflags = [
 "-lm"
 ]
}
- configs定义了该模块编译配置的环境变量speexdsp_cflag_config,在第十三行到第十六行添加了编译需要添加的编译器标志 “-g”,“-O2”,“-fvisibility=hidden”, “-DHAVE_CONFIG_H”。
- “-g”,“-O2”,"-fvisibility=hidden"通过分析原生库config.log和makefile文件,具体请查看第二期内容。
- "-DHAVE_CONFIG_H"通过分析执行build命令后编译ohos上speexdsp的so库报错信息得来。

- 添加"-DHAVE_CONFIG_H"后仍然有报错信息,解决办法是把linux下编译speexdsp原生库./configure后生成的config.h放置在thrid_party/speexdsp下。

第二十四行到第五十二行:
ohos_shared_library("speexdsp_share") {
 sources = [
 "libspeexdsp/preprocess.c",
 "libspeexdsp/jitter.c",
 "libspeexdsp/mdf.c",
 "libspeexdsp/fftwrap.c",
 "libspeexdsp/filterbank.c",
 "libspeexdsp/resample.c",
 "libspeexdsp/buffer.c",
 "libspeexdsp/scal.c",
 "libspeexdsp/smallft.c",
 ]
 defines = [
 "NL_DEBUG",
 "speexdsp_EXPORTS",
 ]
 configs = [
 ":speexdsp_cflag_config",
 ":speexdsp_nowarn_config"
 ]
 include_dirs = [
 ".",
 "libspeexdsp",
 "include"
 ]
 part_name = "speexdsp"
}
- 第24行ohos_shared_library定义了最终生成的模块名,这里代表此模块为最终生成libspeexdsp.z.so。
- 第二十五行到第三十五行sources模块包含了需要编译的源码文件。
- 第四十六行到五十行include_dirs模块包含了编译依赖的头文件路径。
- 第五十一行part_name 该模块编译依赖的编译子系统组件名。该配置项是为了模块最终生成的so文件能在系统编译完后自动拷贝到系统目录中。如果没有配置该项,系统编译完后是不会自动将生成的so文件拷贝到系统目录。
OpenHarmony/sources/third_party/speexdsp/libspeexdsp下添加BUILD.gn文件。
import("//build/ohos.gni")

config("test_nowarn_config"){
 cflags = [
 "-Wno-sign-compare",
 "-Wno-pointer-sign"
 ]
}
config("speexdsp_cflag_config") {
 ldflags = [ "-lm" ]
 cflags_cc = [
 "-g",
 "-O2",
 "-fvisibility=hidden",
 ]
}
config("speexdsp_config") {
 include_dirs = [
 "//third_party/speexdsp/include"
 ]
}
ohos_executable("testdenoise"){
 public_configs = [
 ":speexdsp_config",
 ":test_nowarn_config"
 ]
 sources = [
 "testdenoise.c"
 ]
 configs = [
 ":speexdsp_cflag_config",

 ]
 deps = [
 "//third_party/speexdsp:speexdsp_share"
 ]
 part_name = "speexdsp"
}
ohos_executable("testecho"){
 public_configs = [
 ":speexdsp_config",
 ":test_nowarn_config"
 ]
 sources = [
 "testecho.c"
 ]
 configs = [
 ":speexdsp_cflag_config"
 ]
 deps = [
 "//third_party/speexdsp:speexdsp_share"
 ]
 part_name = "speexdsp"
}
ohos_executable("testjitter"){
 public_configs = [
 ":speexdsp_config",
 ":test_nowarn_config"
 ]
 sources = [
 "testjitter.c"
 ]
 configs = [
 ":speexdsp_cflag_config"
 ]
 deps = [
 "//third_party/speexdsp:speexdsp_share"
 ]
 part_name = "speexdsp"
}
ohos_executable("testresample"){
 public_configs = [
 ":speexdsp_config",
 ":test_nowarn_config"
 ]
 sources = [
 "testresample.c"
 ]
 configs = [
 ":speexdsp_cflag_config"
 ]
 deps = [
 "//third_party/speexdsp:speexdsp_share"
 ]
 part_name = "speexdsp"
}
ohos_executable("testresample2"){
 public_configs = [
 ":speexdsp_config",
 ":test_nowarn_config"
 ]
 sources = [
 "testresample2.c"
 ]
 configs = [
 ":speexdsp_cflag_config"
 ]
 deps = [
 "//third_party/speexdsp:speexdsp_share"
 ]
 part_name = "speexdsp"
}
测试用例gn化代码解析的内容与speexdsp编译gn化内容相似,这里不做重复解释,只补充以下几点。
- 测试用例是在ohos上测试libspeexdsp.z.so功能用的。
- 第28、48、68、88、108行:gn中的目标类型executable表示生成可执行文件testdenoise、testecho、testjitter、testresample、testresample2。
- 第41、61、81、101、121行:deps表示测试用例模块编译依赖其他模块,这里指的是测试用例的编译依赖。libspeexdsp.z.so库。
- 第45、65、85、105、125行:part_name表示测试用例模块编译依赖的编译子系统组件名。该配置项是为了模块最终生成的so文件能在系统编译完后自动拷贝到系统目录中。如果没有配置该项,系统编译完后是不会自动将生成的so文件拷贝到系统目录。
- 定义子系统并加入到编译框架
在系统源码根目录下创建一个目录作为子系统目录,子系统目录可创建在OpenHarmony源码目录任意位置。
- 本项目以third_party/speexdsp作为为子系统目录,子系统名字即为speexdsp。
在系统源码根目录下创建一个目录作为子系统目录,子系统目录可创建在OpenHarmony源码目录任意位置。
子系统speexdsp目录下创建ohos.build文件,build构建时会先读取该文件。
"subsystem": "speexdsp",
 "parts": {
 "speexdsp": {
 "module_list": [
 "//third_party/speexdsp/libspeexdsp:testdenoise",
 "//third_party/speexdsp/libspeexdsp:testecho",
 "//third_party/speexdsp/libspeexdsp:testjitter",
 "//third_party/speexdsp/libspeexdsp:testresample",
 "//third_party/speexdsp/libspeexdsp:testresample2"
 ],
 "inner_kits": [
 ],
 "system_kits": [
 ],
 "test_list": [
 ]
 }
 }
}
- build文件夹下的subsystem_config.json文件,主要包含子系统名称与路径信息,在preloader阶段被加载,根据子系统名称和路径信息查找该路径下的ohos.build文件。
- 其中需要包含module_list、inner_kits、system_kits、test_list四个部分的声明:
- module_list:部件包含的模块列表。
- inner_kits:部件提供其它部件的接口。
- system_kits:部件提供给生成应用的接口。
- test_list:部件对应模块的测试用例。
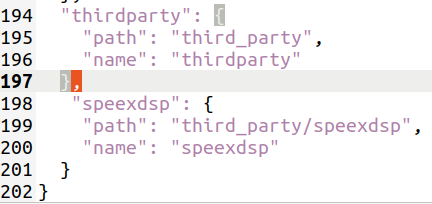
接下来把子系统speexdsp配置到build/subsystem_config.json。
"speexdsp": {
 "path": "third_party/speexdsp",
 "name": "speexdsp"
 },
注意:要求符合json语法规范,要在}前加,(如下图所示):
将子系统及其组件加入产品定义中,以rk3568为例,产品定义文件在vendor/hihope/rk3568/config.json,需要将以下内容添加到config.json中:
{
 "subsystem": "speexdsp",
 "components": [
 {
 "component": "speexdsp",
 "features": []
 }
 ]
 },
© 版权声明
文章版权归作者所有,未经允许请勿转载。